

You’re scrolling through social media and you found a mouthwatering photo. You find yourself suddenly feeling hungry because of it! This is all thanks to food photography and food photography lighting. Food photography is a form of art that captures the beauty and deliciousness of food in a photograph. It is an essential element of the food industry, from restaurants to cookbooks to food blogs.
Lighting plays a crucial role in food photography, as it makes or breaks the final image. This blog aims to provide an in-depth guide on how to achieve the best lighting for food photography.
Table of Contents
Natural Light vs Artificial Light
First, let’s differentiate the different types of lighting.Photographers have the option to use natural light or artificial light. Natural light is light that comes from the sun and is considered the best lighting for photography. It is soft and diffused, which creates a warm and inviting atmosphere. Artificial light, on the other hand, is light that comes from a light source, such as a lamp or a flash. Artificial light can be harsher and more intense than natural light, which can create a more formal and sterile atmosphere.
The pros and cons of each lighting type should be considered when deciding which to use. Natural light is free, easy to access and creates beautiful, soft images. However, it is dependent on the weather and the time of day. Controlling it is also another topic for discussion. Artificial light, on the other hand, is easy to control and can be used at any time of day. However, it can be expensive and can create harsh shadows. Proper control of both is necessary in all fields of photography.
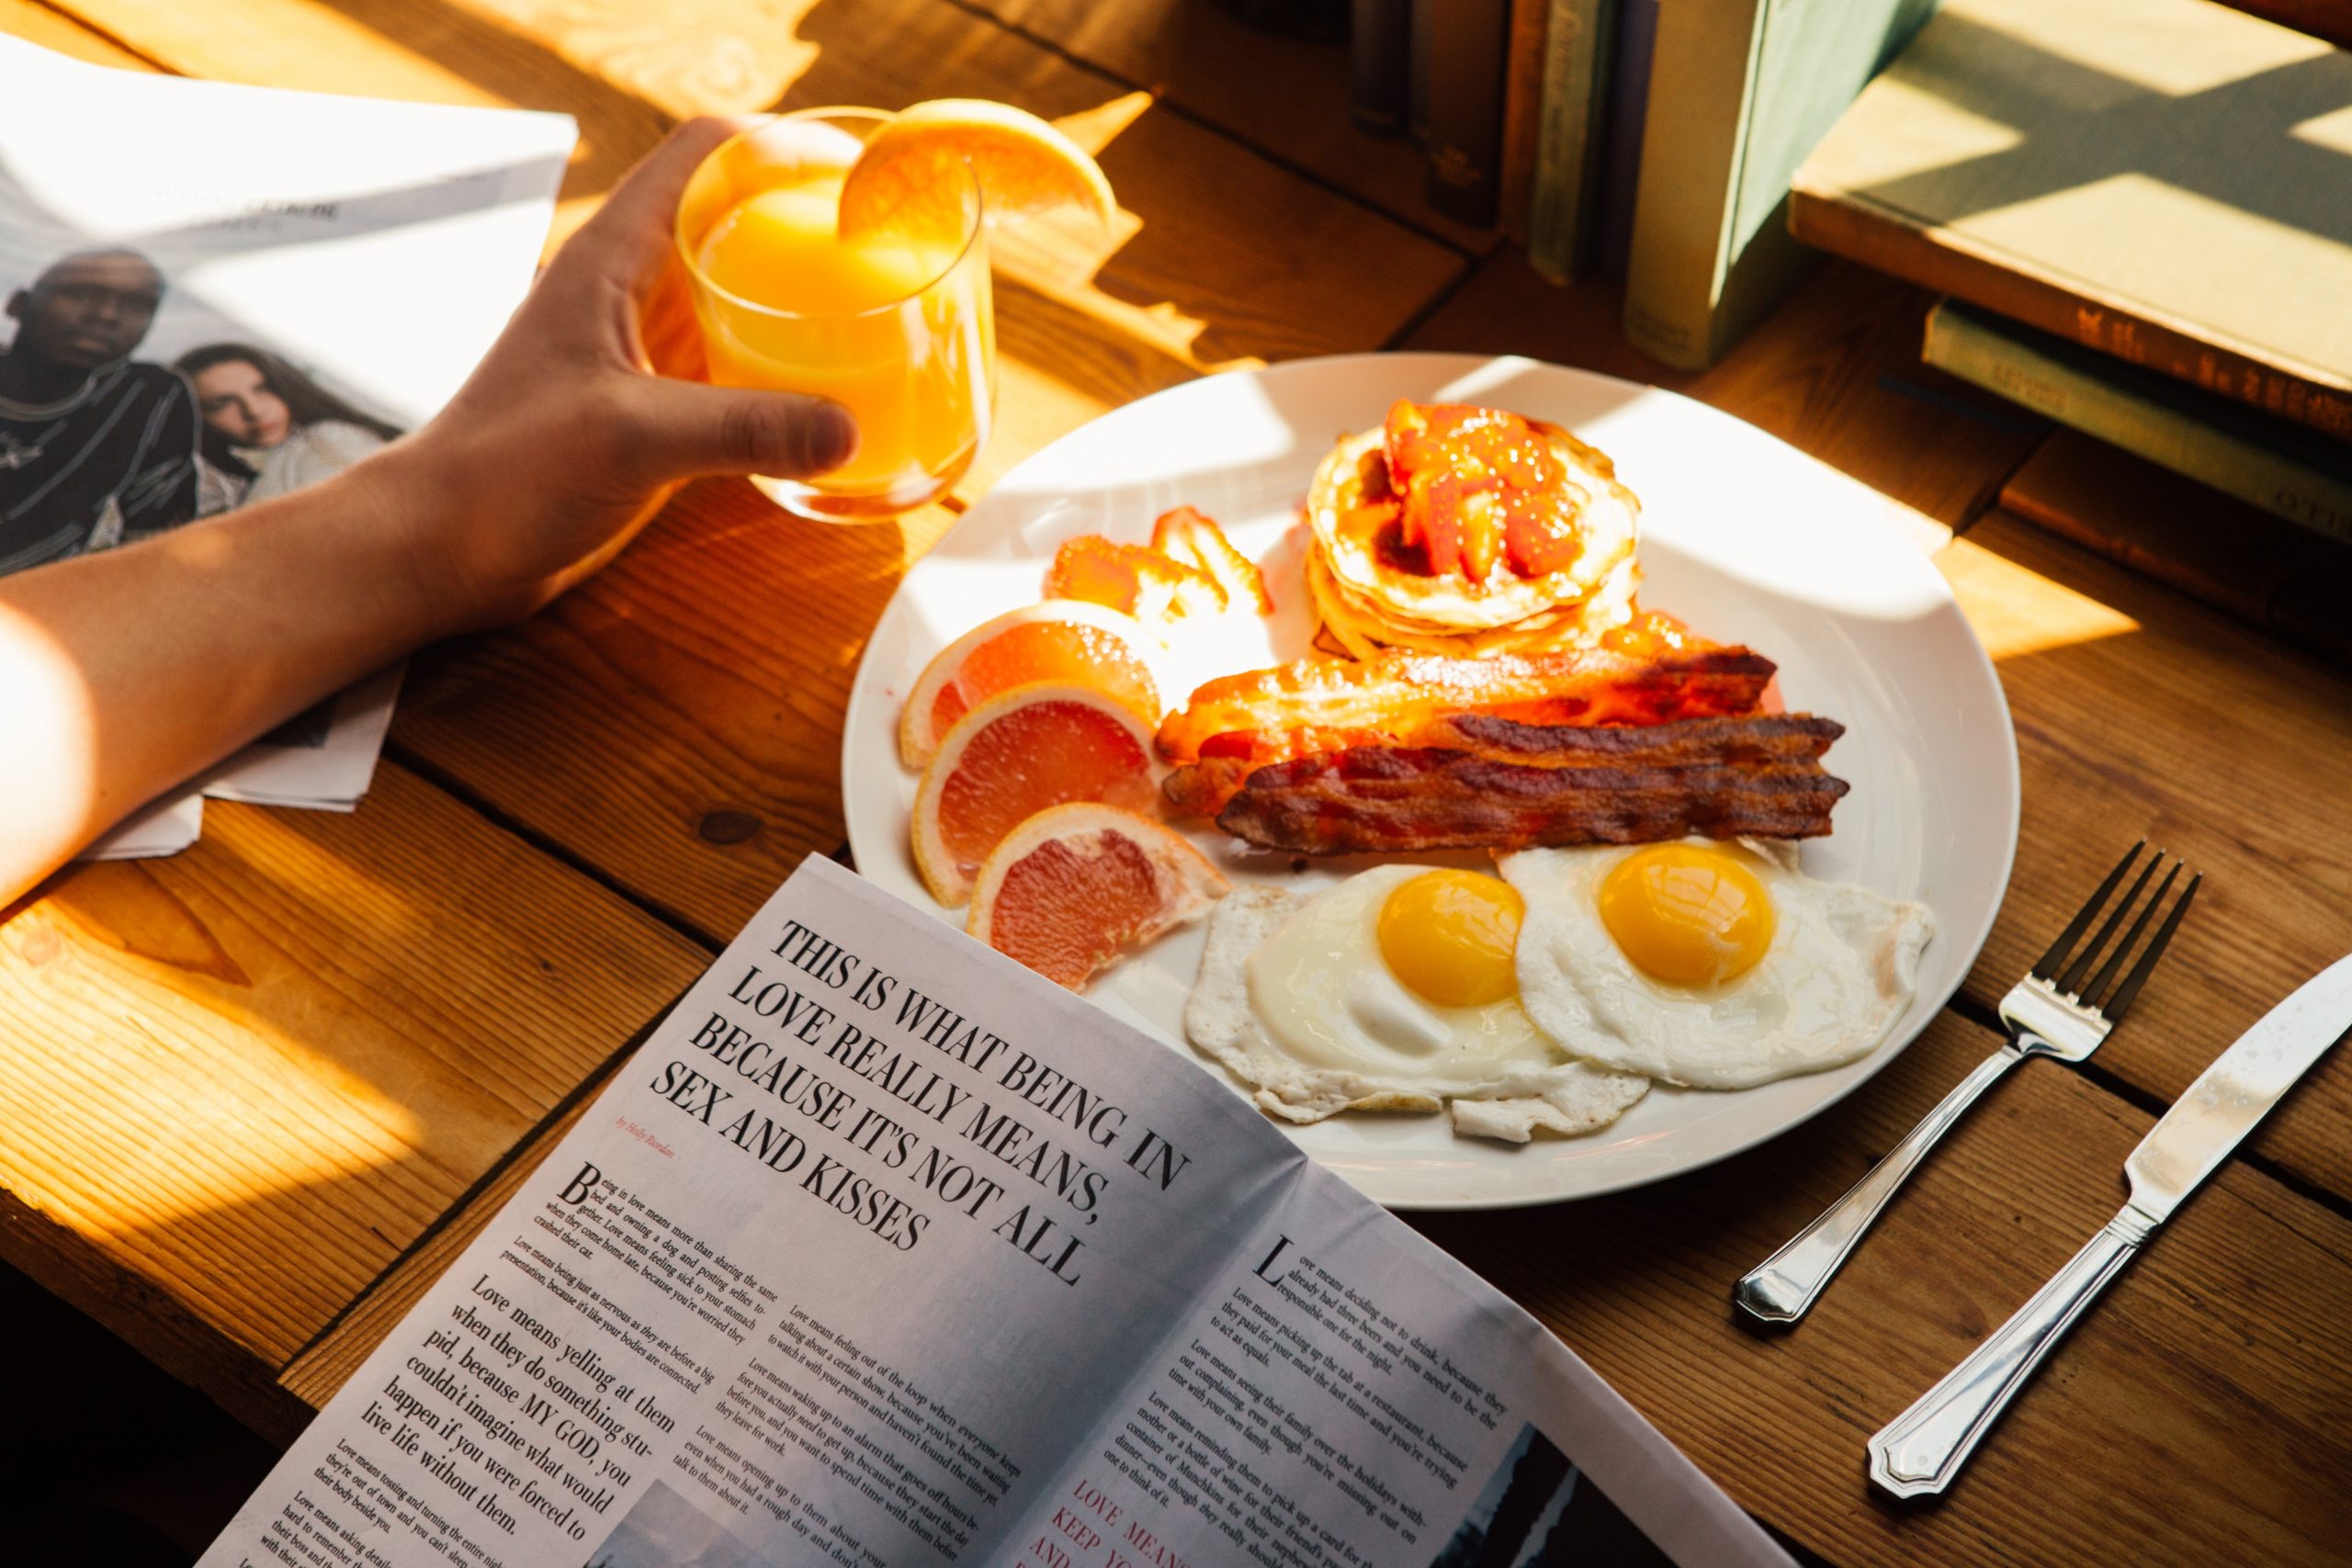
Editor’s tip! The best times of day to use natural light are during the golden hours, which are the hours around sunrise and sunset when the light is warm and golden. This light is perfect for food photography, as it creates a warm and inviting atmosphere.
Color Temperature
Color temperature is a measure of the color of light and is measured in Kelvins. The color temperature of light affects the way food is perceived in a photograph. Warmer light, such as the light during the golden hours, makes food appear more appetizing and inviting. Cooler light, on the other hand, can make food appear less inviting and unappetizing. However, there are times that using cooler light is beneficial for photos. Find the perfect balance for these two and try to experiment!
Gels and filters essentially control the temperature of your light sources. Cameras also have built in features for controlling the color temp. Gels are colored sheets of plastic that are placed over the light source to change the color of the light. Filters on the other hand are placed in front of the lens to change the color of the light that enters the camera. Both gels and filters can be used to balance the color temperature of light to enhance food photography.
Shadows and Highlights
Shadows and highlights are essential elements of food photography, as they add depth and dimension to an image. These also provide contrast that add interest to your photos. Shadows are useful in creating a sense of depth, while highlights are useful in drawwing attention to specific parts of the image.
To create soft shadows, photographers can use diffused light sources, such as a softbox or an umbrella. Soft shadows are perfect for food photography, as they create a warm and inviting atmosphere. Hard shadows, on the other hand, can be created using a direct light source, such as a bare bulb or a flashlight. Hard shadows can be used to create a more formal and dramatic atmosphere.
Moreover, reflectors and diffusers can be used to control highlights. Reflectors are used to bounce light back onto the subject. Meanwhile, diffusers are used to soften the light. Both can be used to control the highlights and create a more balanced image.
Angles and Composition
Moving on, we also introduce the idea of angles and composition. A properly lit image is good to look at. However, pairing this with a properly composed image makes it reach a level of perfection.
Angles and composition are crucial in food photography. The angle at which you photograph your food greatly affects the overall look and feel of the photo. Shooting from above makes the food look more natural, while shooting from below can make the food look more dramatic. Experimenting with different angles can help you achieve the perfect shot.
Composition is also important in food photography. It’s essential to think about the placement of the food in the frame, as well as the placement of other elements in the photo. Using the rule of thirds, where you divide the frame into thirds horizontally and vertically, can help create a visually pleasing composition.
Finally, using foreground, middle ground, and background can create depth in food photography. The foreground is the area closest to the camera, the middle ground is the area in the middle of the frame, and the background is the area furthest from the camera. By using these three elements, you can create a more dynamic photo that will draw the viewer’s eye into the frame.
Camera Settings
To achieve the best results in food photography, it’s important to understand how to set your camera properly. The aperture, shutter speed, and ISO are all settings that can greatly affect the final result.
The aperture is the opening in the lens that allows light to enter the camera. This can be adjusted to control the amount of light that enters the camera, as well as the depth of field in the photo. A wider aperture (such as f/2.8) will allow more light to enter the camera and create a shallow depth of field, while a narrower aperture (such as f/22) will allow less light to enter the camera and create a deeper depth of field.
The shutter speed is the amount of time that the camera’s shutter is open. The shutter speed can be adjusted to control the amount of light that enters the camera, as well as the movement in the photo. A slower shutter speed (such as 1/30th of a second) will allow more light to enter the camera and create motion blur, while a faster shutter speed (such as 1/1000th of a second) will allow less light to enter the camera and freeze motion.
The ISO is the sensitivity of the camera’s sensor to light. The ISO can be adjusted to control the amount of light that enters the camera, as well as the noise in the photo. A lower ISO (such as 100) will produce less noise in the photo, but will require more light, while a higher ISO (such as 3200) will produce more noise in the photo, but will require less light.
In food photography, it’s recommended to use a tripod to keep the camera steady and to avoid any blur. Also, it’s important to use manual mode for food photography to have full control over the aperture, shutter speed, and ISO settings. This will allow you to achieve the best results by adjusting these settings to suit the specific lighting conditions of your shoot.
Best Lighting Equipment
When it comes to achieving the best lighting for food photography, having the right equipment is crucial. There are a variety of types of lighting equipment available for food photography, each with its own unique advantages and disadvantages.
One popular option is using a softbox. Softboxes are a type of lighting modifier that softens and diffuses light, creating a natural-looking and evenly lit photo. They are great for creating soft shadows and reducing harsh highlights.
Another option is using an umbrella. Umbrellas are similar to softboxes in that they diffuse and soften light, but they also offer more flexibility in terms of adjusting the light direction.
Finally, diffusers are another great option for food photography lighting. Place them in front of the light source to soften and spread the light evenly. This is applicable to both natural and artificial light sources.
When determining which equipment is best for your needs, consider your budget, the type of food photography you will be doing, and the lighting conditions you will be working in. Experimenting with different equipment and techniques is the best way to find what works best for you.
Best Practices for Food Photography Lighting
When it comes to food photography lighting, there are a few best practices you should follow to achieve the best results. One tip is to always shoot in natural light when possible. This will give your photos a natural and warm look that is perfect for food photography.
Another tip is to be mindful of the direction of light. Shooting with the light coming from the side or behind the food can create interesting shadows and highlights that will make your food stand out.
Another common mistake that many photographers make is using too much artificial light. This can make the food look unnatural and unappetizing. To avoid this, try to use natural light or a minimal amount of artificial light to enhance the food.
It’s also important to create a consistent look and feel in your food photography. This is achievable by using the same type of light, the same editing techniques, and similar compositions in all of your photos. This will create a cohesive look that will make your food photography stand out.

Conclusion
Food photography is a challenging but rewarding field that requires a combination of artistic and technical skills. As we have seen, lighting is one of the most critical elements in food photography, as it can make or break a photo. In this article, we have provided an in-depth guide on how to achieve the best lighting for food photography.
In conclusion, food photography is a challenging but rewarding field that requires a combination of artistic and technical skills. By following the tips and best practices outlined in this article, you will be well on your way to creating mouth-watering food photos that will make your audience hungry for more. Remember to experiment with different lighting techniques and to have fun with it!
Check out our other blogs:
The 5 Best AI Art Generators
Why Choose Metal Prints using Chromaluxe?
Guide to Product Photography
Guide to Toy Photography
The Art of Editing Photos
Best Outdoor Print and Signage Options
The Best Metal Print Companies
The Printing Mediums of Wall Art
We enjoy reading your comments and insights with our posts! Should you have any questions or concerns, feel free to leave them below! -Mark