

Lighting in photography is one of the most essential factors into taking great photos. Dive into the different properties that affect it and learn how you can apply this knowledge to improve your photography.
Table of Contents
What is Lighting in Photography?
Lighting in photography manifests how your light source is oriented with respect to your subject. This can be seen in whatever light source you use. There are numerous ways on how to set up your lighting in photography such as natural light, front light, back light, etc.
Types of Lighting
Lighting comes in different forms. These can be utilized in the field of photography. As photography literally translates to “drawing with light”, it is of utmost importance to have a solid understanding of this concept.
1. Natural Light
Natural light comes from the sun. Both Professional and Amateur photographers find it best to use natural light for their photos. This is due to the fact that the setup time when utilizing natural light is shorter than setting up when using artificial lighting.
Natural light also manifests even at night time and can mostly be seen with astro-photography. Taking photos of the stars and galaxy uses the long exposure technique which allows the camera to take in more light for a long shutter speed.
This type of lighting is also imminent in landscape photography as well as street photography. This is because the use of artificial lighting in these photography styles is not feasible.
2. Artificial Light
Artificial lighting is achieved by purposely setting up light sources to illuminate a scene or subject. The use of artificial lighting provides distinct outputs. You’re able to cast shadows and highlights to your subject that is not achievable by simply using natural light.
The use of artificial light is usually done inside studios, where natural light is absent or at minimum. Others also prefer doing photoshoots at night which totally eliminates natural light. Though all of these are best practices with the use of artificial lighting, the use of artificial light together with natural lighting can also produce stunning results
One can debate the use of reflectors as a source of artificial lighting. I believe that this is a form of artificial lighting as well. When taking a photo with your camera against the sun, it’s noticeable that your subject will be dark. The use of a reflector to use the natural light source to light up your subject will minimize this. Thus, artificial light together with natural light eliminates certain flaws and lets the photographer take control of their output.
Light Orientations
The placement of your light source, may it be natural or artificial, can make or break your photo. It’s important to have a full understanding of the effects and details these orientations bring forward.
1. Front Light
This utilizes the use of a light source by placing it directly in front of the subject. Front lighting is used if all the details of the subject are concentrated on its front view.
The use of the camera’s flash is the exact definition of front lighting. This is a straightforward approach to lighting but it comes at a cost. The subject may look flat because of the absence of shadows and highlights.
2. Back Light
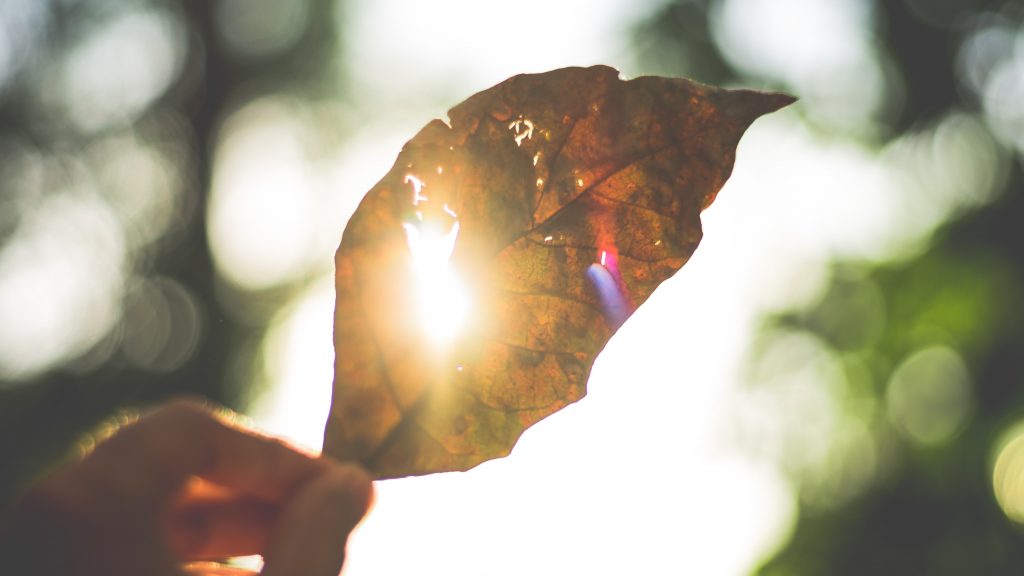
The use of a backlight produces the rim lighting effect. Rim lighting casts light that outlines the shape of the subject. This gives off a stunning attention to detail of the subject’s shape.
Aside from rim lighting, another effect of backlight is the production of silhouettes. This is also very useful in highlighting the shape of your subject. In addition to these, backlight can also produce lens flares. If you look for something to add spice to your photo, maybe a lens flare is what you’re looking for!
3. Side Light
Side light corresponds to the placement of light of approximately 90 degrees with respect to the camera. The use of side lighting is most efficient to bring forth dimension to the subject. It captures one side of the subject well lit and the other with shadows.
Side light also brings forth contrast in photos. The transition between light and dark within the subject portrays difference in light value thus showing contrast.
To minimize the darkness of the other half of the subject, a countermeasure is the use of a reflector. It bounces the side light softly, and with this still provides contrast and light value difference.
Lighting Properties
Properties in your photo that are related to lighting should be taken into consideration when processing your photos. These are exposure, contrast, highlights, shadows, whites, and blacks.
Exposure
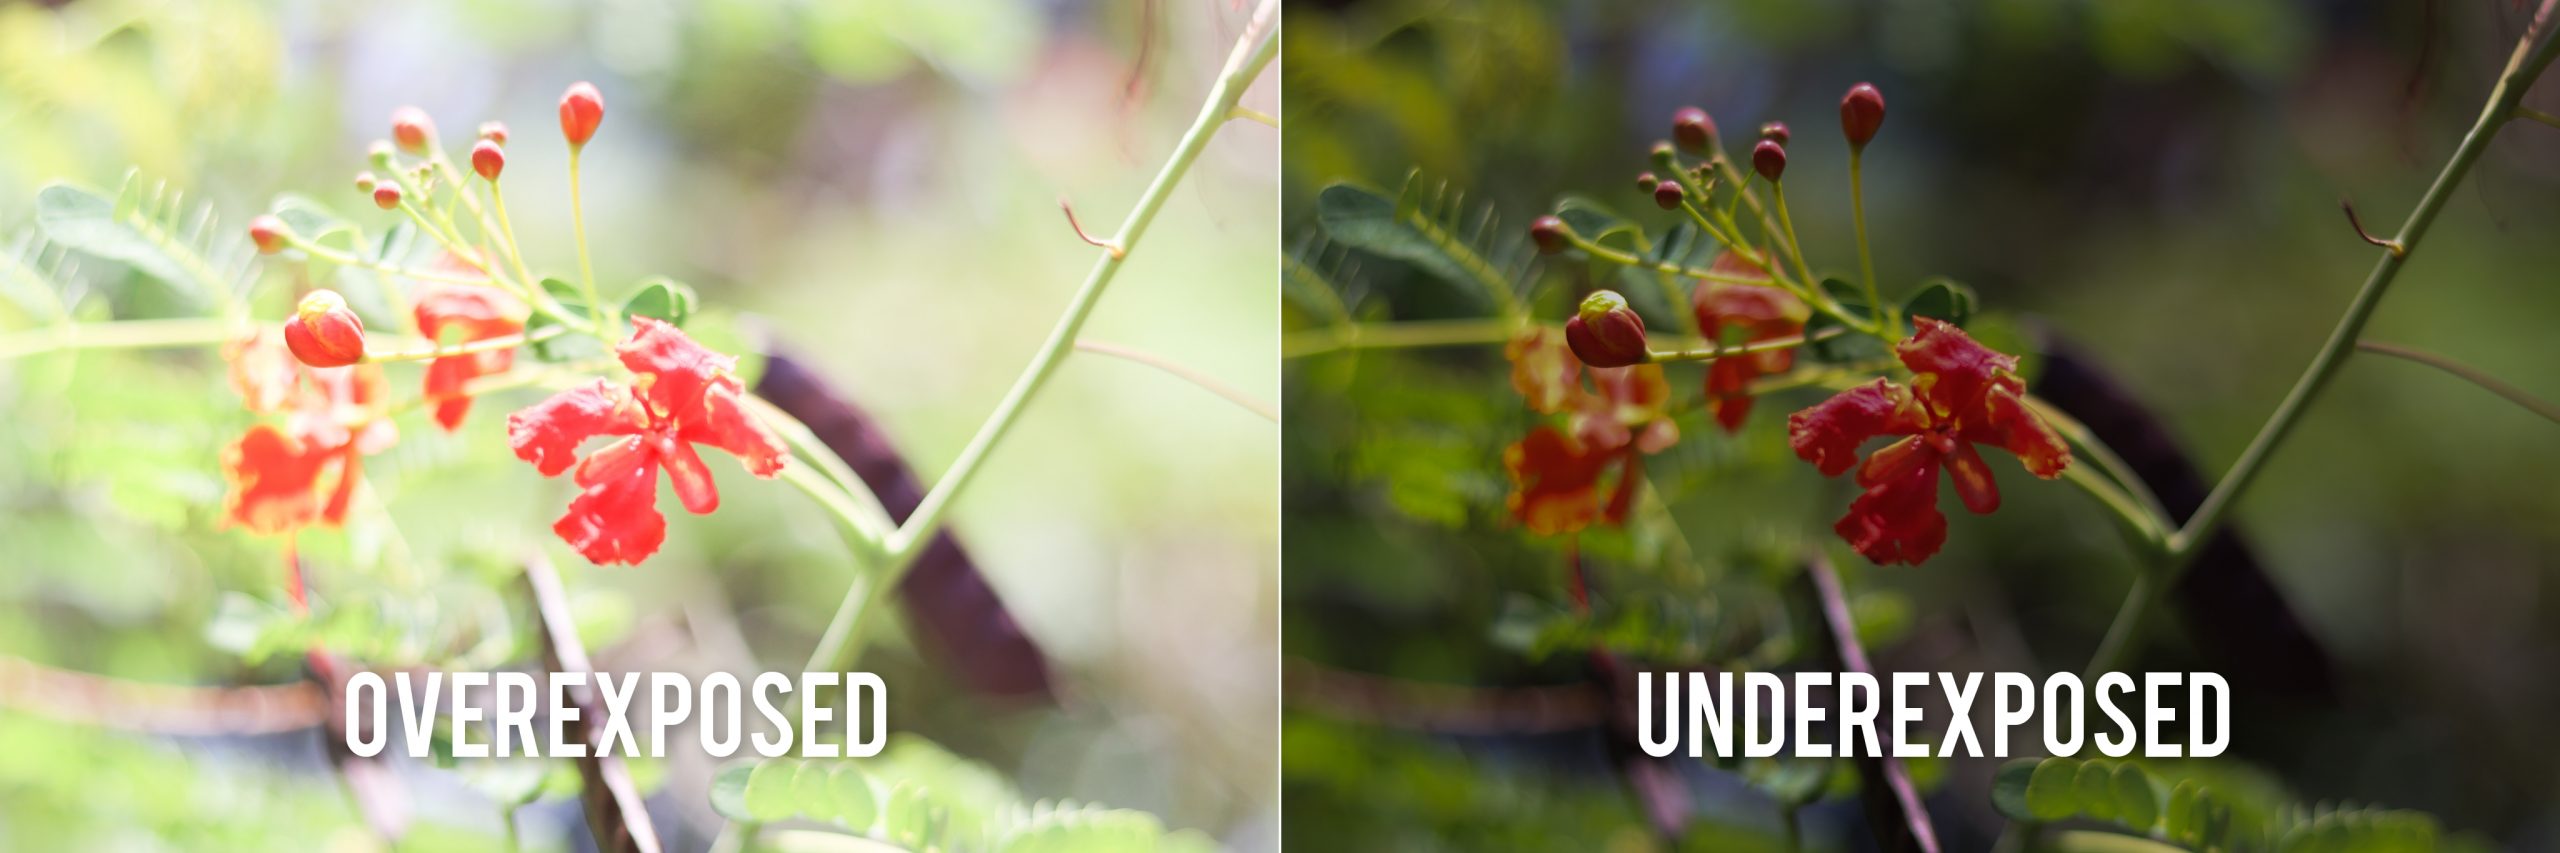
Exposure is the amount of light reaching your camera’s sensor, creating visual data over a period of time.[1] We see this in photos through how bright or dark it appears. A photo is overexposed if it appears extremely bright that most of the elements in the photo looks white. On the other hand, a photo is underexposed if it appears extremely dark such that the elements inside the photo are too dark it cannot be seen at all.
Contrast
In essence, contrast means difference. This property of lighting in photography is the difference of tones and colors. If your photo has multiple colors then it could be referred to as a high contrast photo. Understanding the color wheel and its various relationships would yield better contrasting photos. Meanwhile, contrast in tones refers to the difference of brightness of the elements in your photo.
Highlights
Highlights refer to the already visible bright areas in your photo. These are points in the photo where your light source hit greatly. Changing the distance of your light source to your subject adjusts this. This property of lighting in photography helps with improving tonal contrast to your photos.
Shadows
Shadows in photography are the areas in which the light source is unable to hit. These are the dark areas in the photo that are always affected by the light placement. When this is utilized, it is able to not only create contrast but also provide depth.
Outside of photography, shadows manifest distance with relation to light. At certain times of the day, shadows appear to be longer or shorter. This is an example of how shadows could help portray distance.
Whites
Whites as a property of lighting in photography refer to the brightest part of the photo. The difference between whites and highlights are their brightness. Highlights relate to the bright areas of the photo while Whites relate to the brightest ones.[2]
Blacks
On the other hand, Blacks is the property of lighting in photography relating to the darkest part of the photo. In a similar way, Blacks and Shadows signify the darkest and dark areas of the photo respectively.
Post-processing of Photos
In this section, we’ll talk about adjusting these properties in software editing programs. Most photo editing software are capable of adjusting these properties of lighting in photography. Here, I demonstrate how the various adjustments of these affect the output of your photo. Adobe Photoshop Express – a free to use photo editing software by Adobe is the program used in this demo.
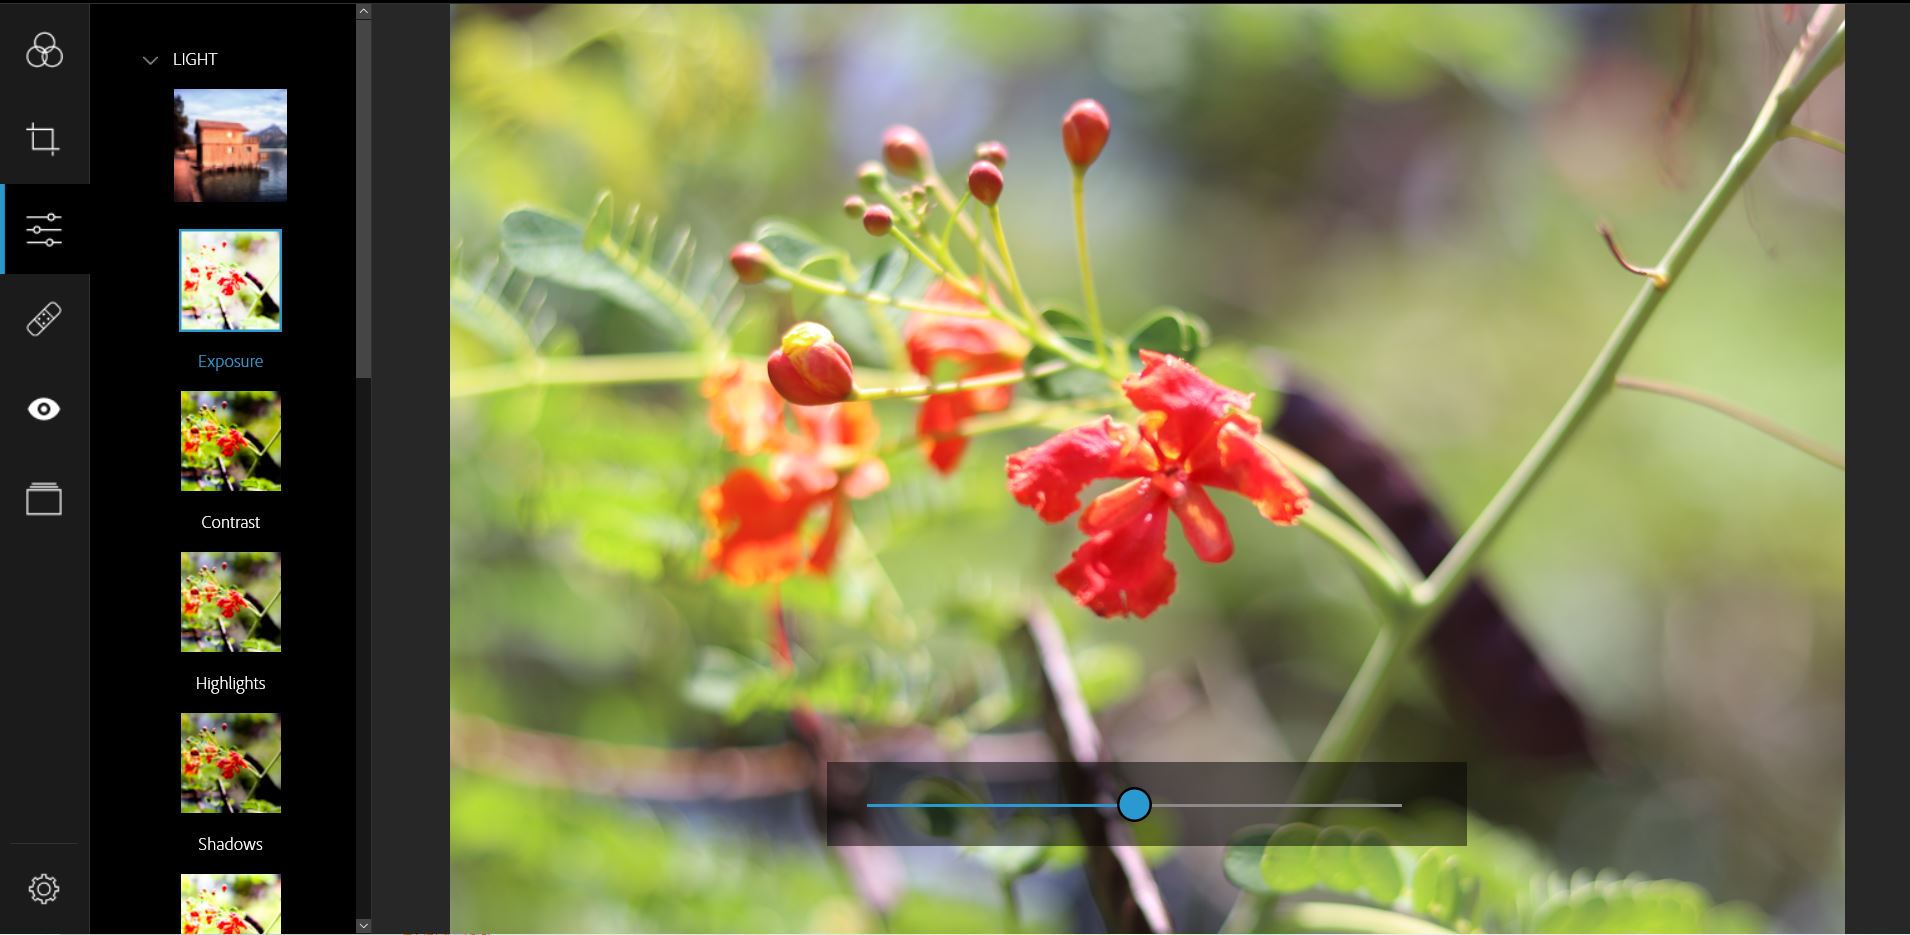
I. Exposure Adjustments
Bumping up the exposure property causes the whole photo to become brighter. Lowering it makes the entire photo darker. These images show how increasing (left photo) and decreasing (right photo) the value of exposure affects the image. A balance between the two is what we look out for!
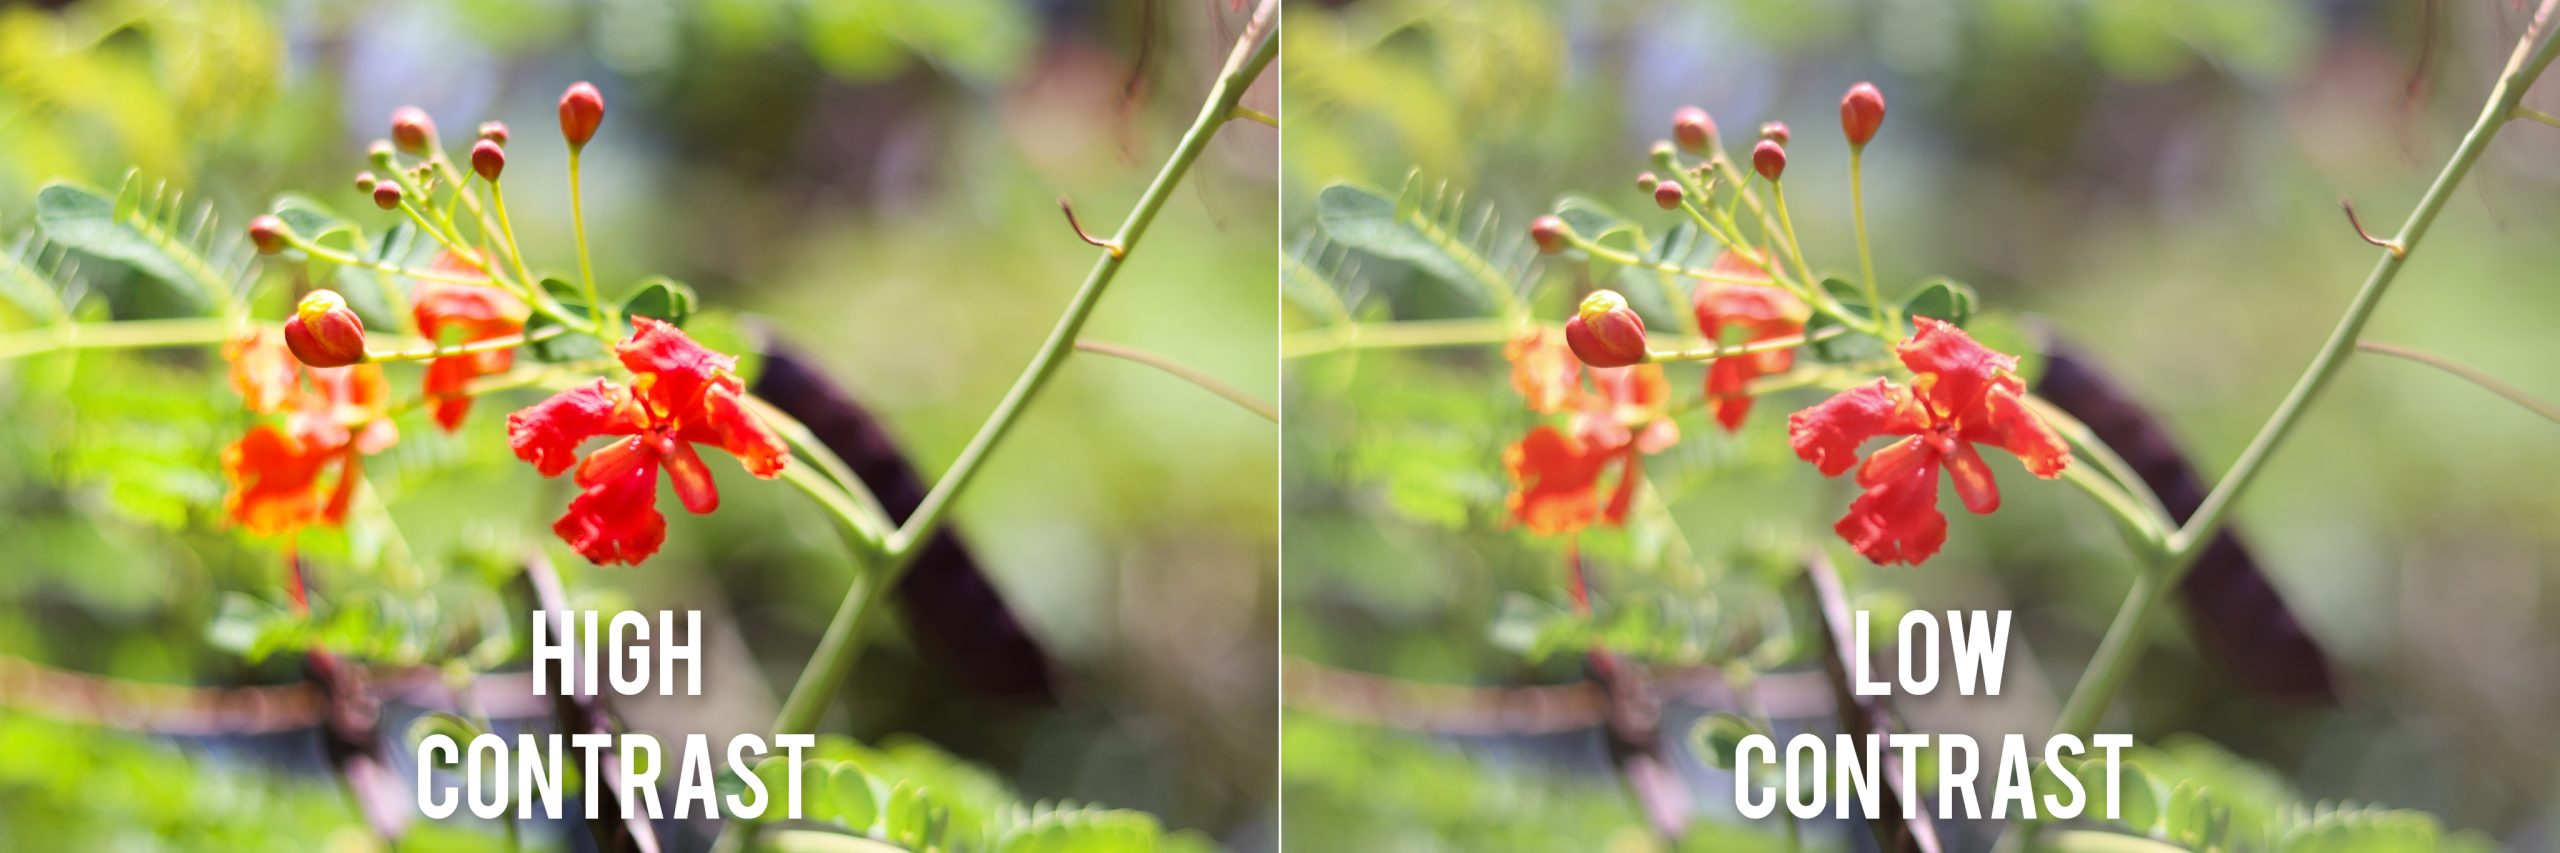
II. Contrast Adjustments
Remember that contrast shows difference. Here is a look of how adjusting this property of lighting in photography affects the image. A high contrast value makes the photo more vibrant and makes the colors distinct. Meanwhile, in the low contrast photo the difference between the flower and its surrounding elements are not drastic thus making the photo look flat.
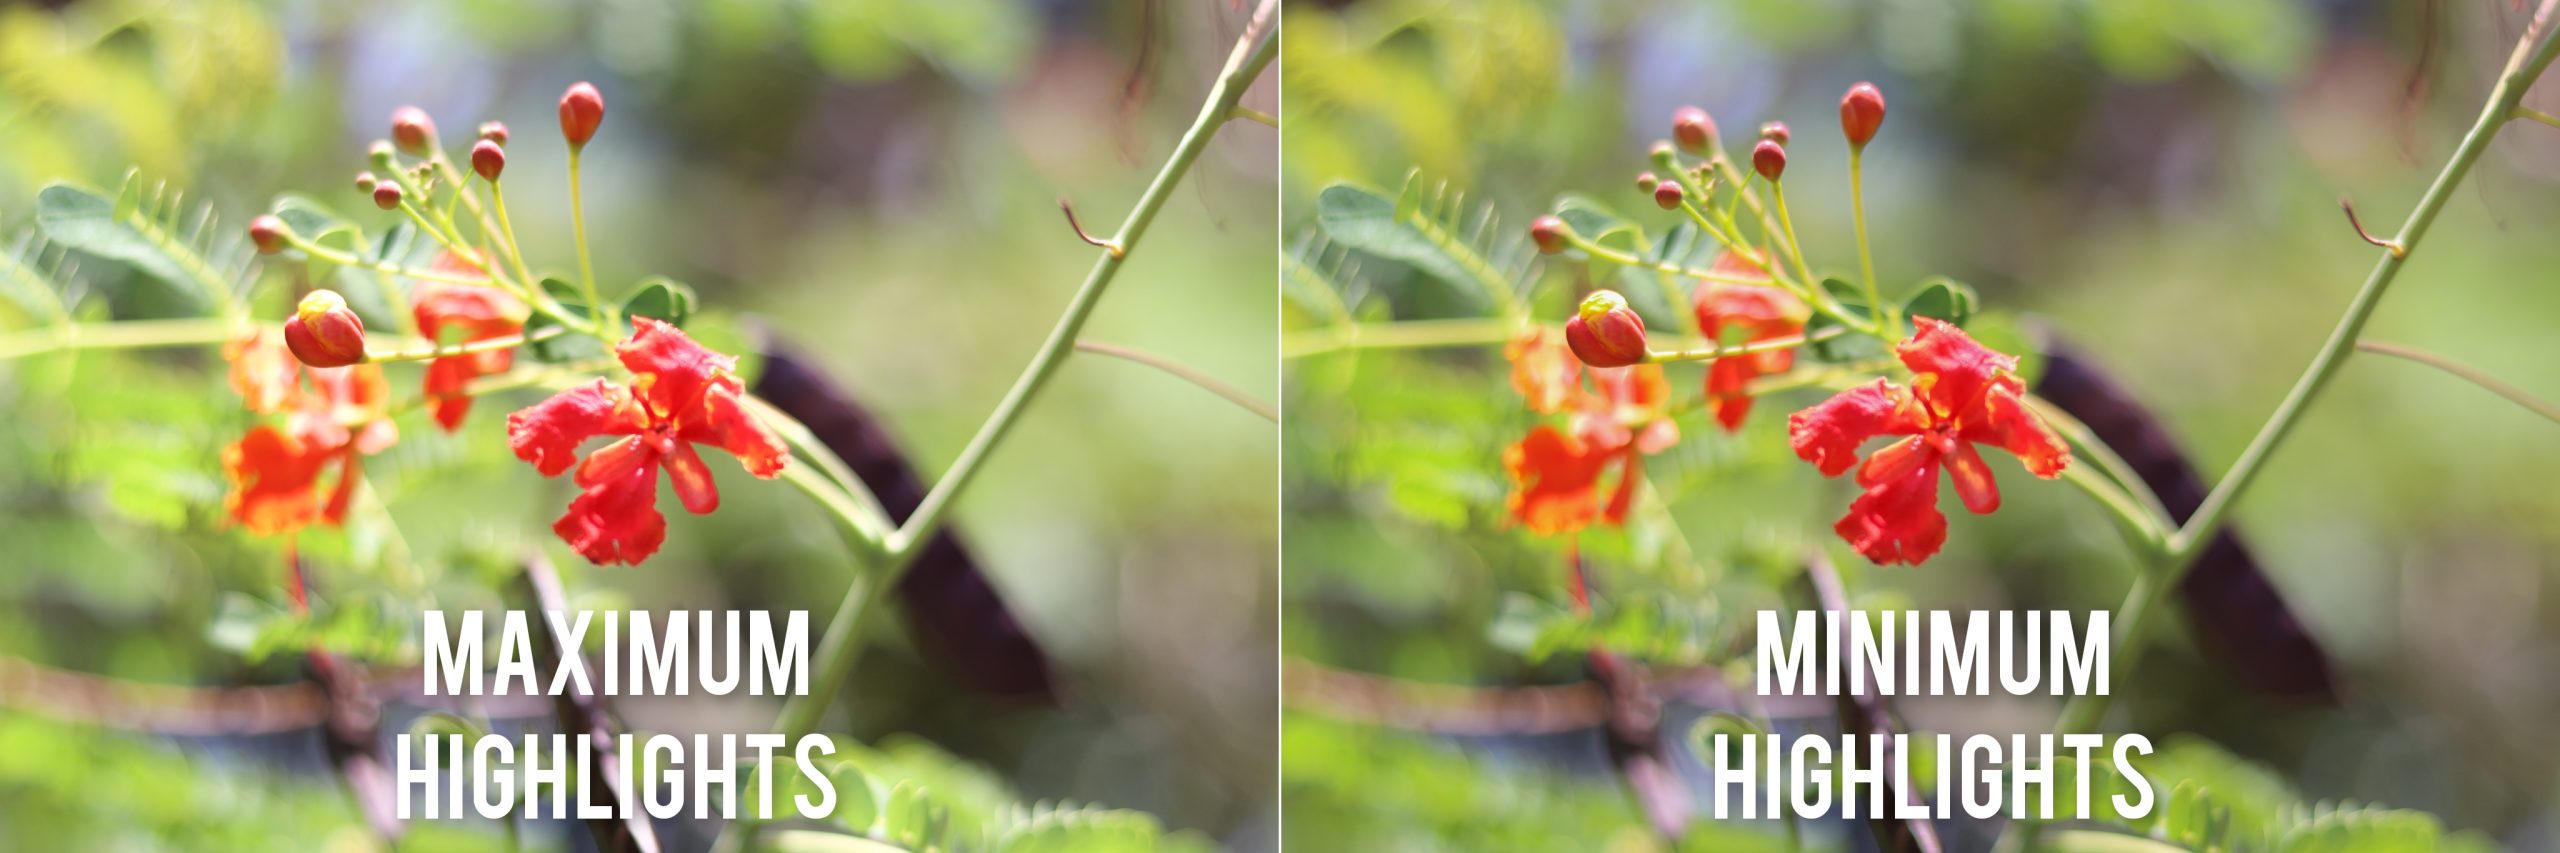
III. Highlights Adjustments
In adjusting the highlights, note that this affects the bright parts of the photo. After adjusting this, the area on top of the flower and the stem differ after adjustments are done.
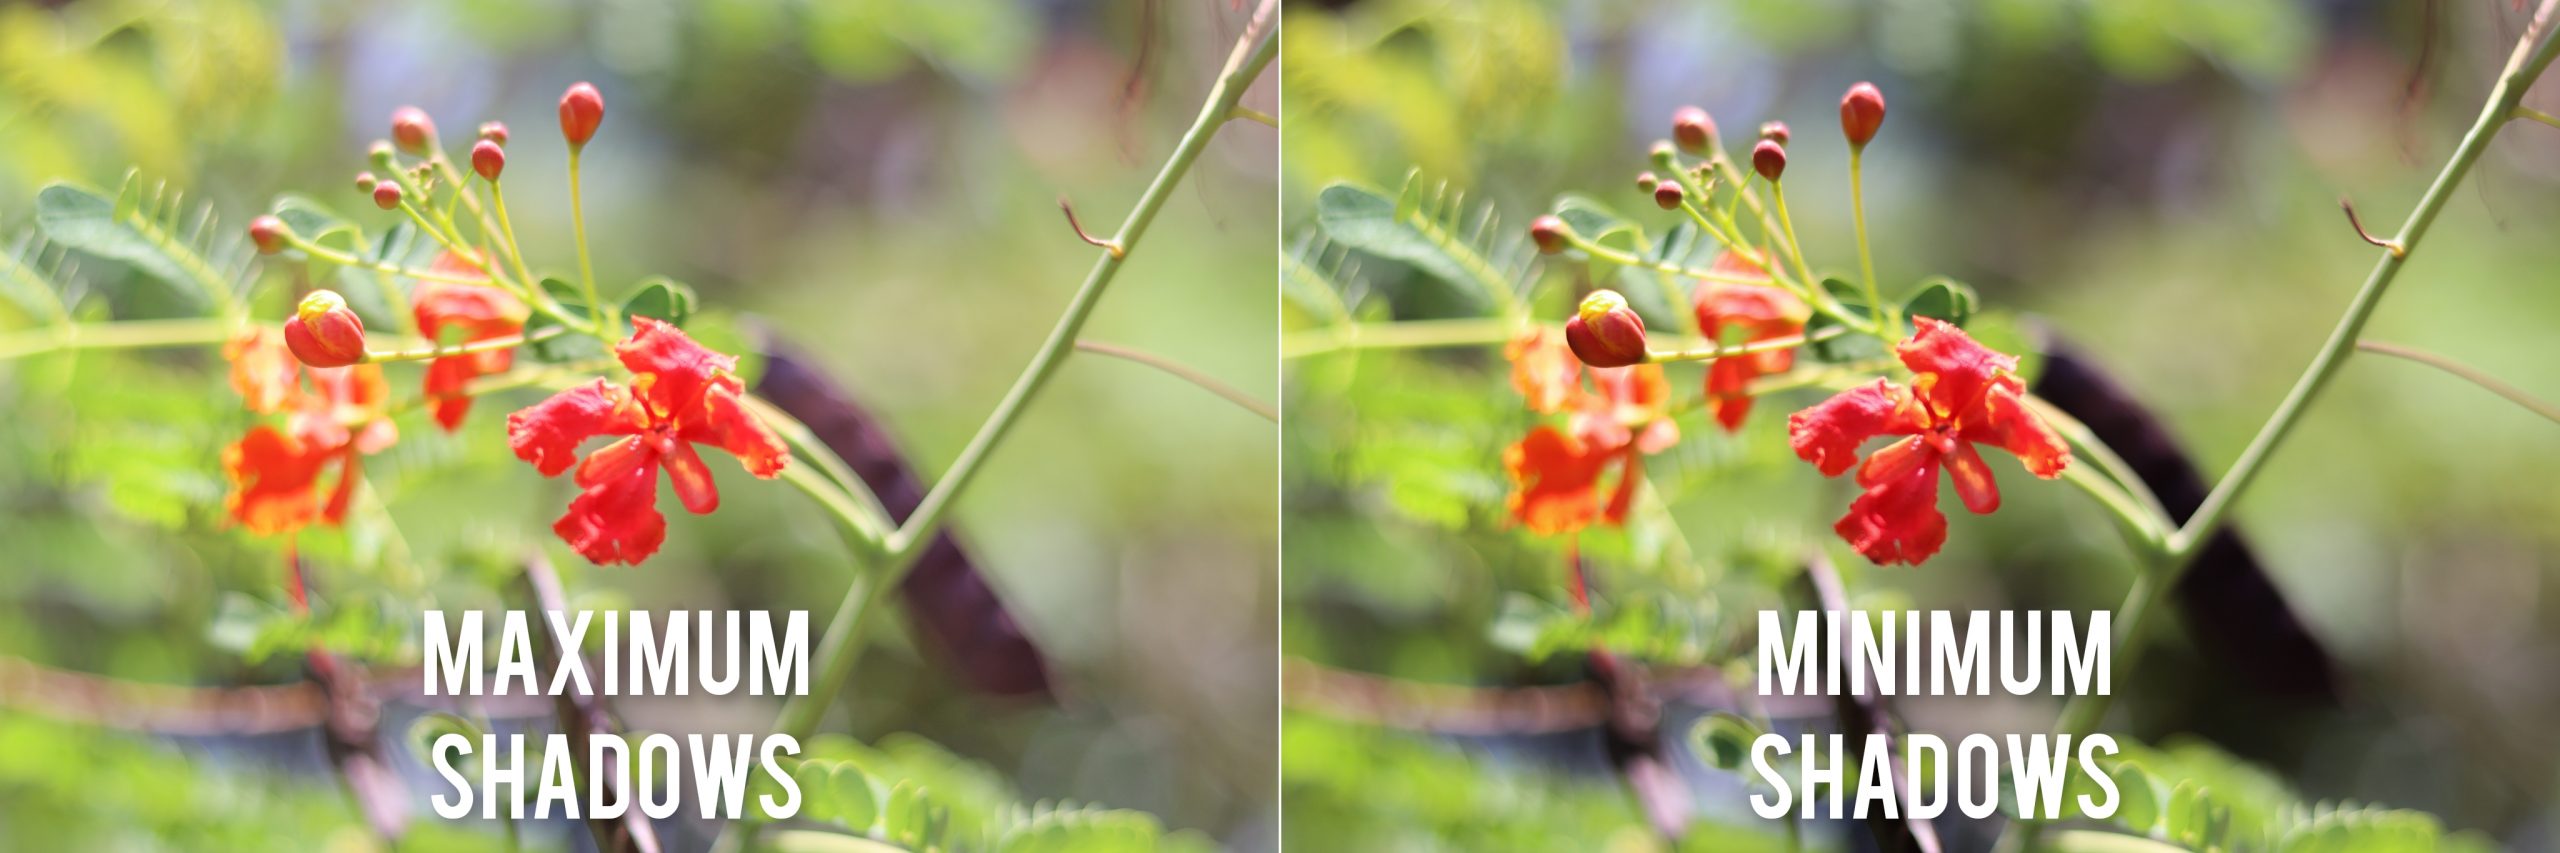
IV. Shadows Adjustments
With shadow adjustments, the dark parts of the photo are changed. These are mostly found in the background. The most visible changes directly affect how depth is perceived.
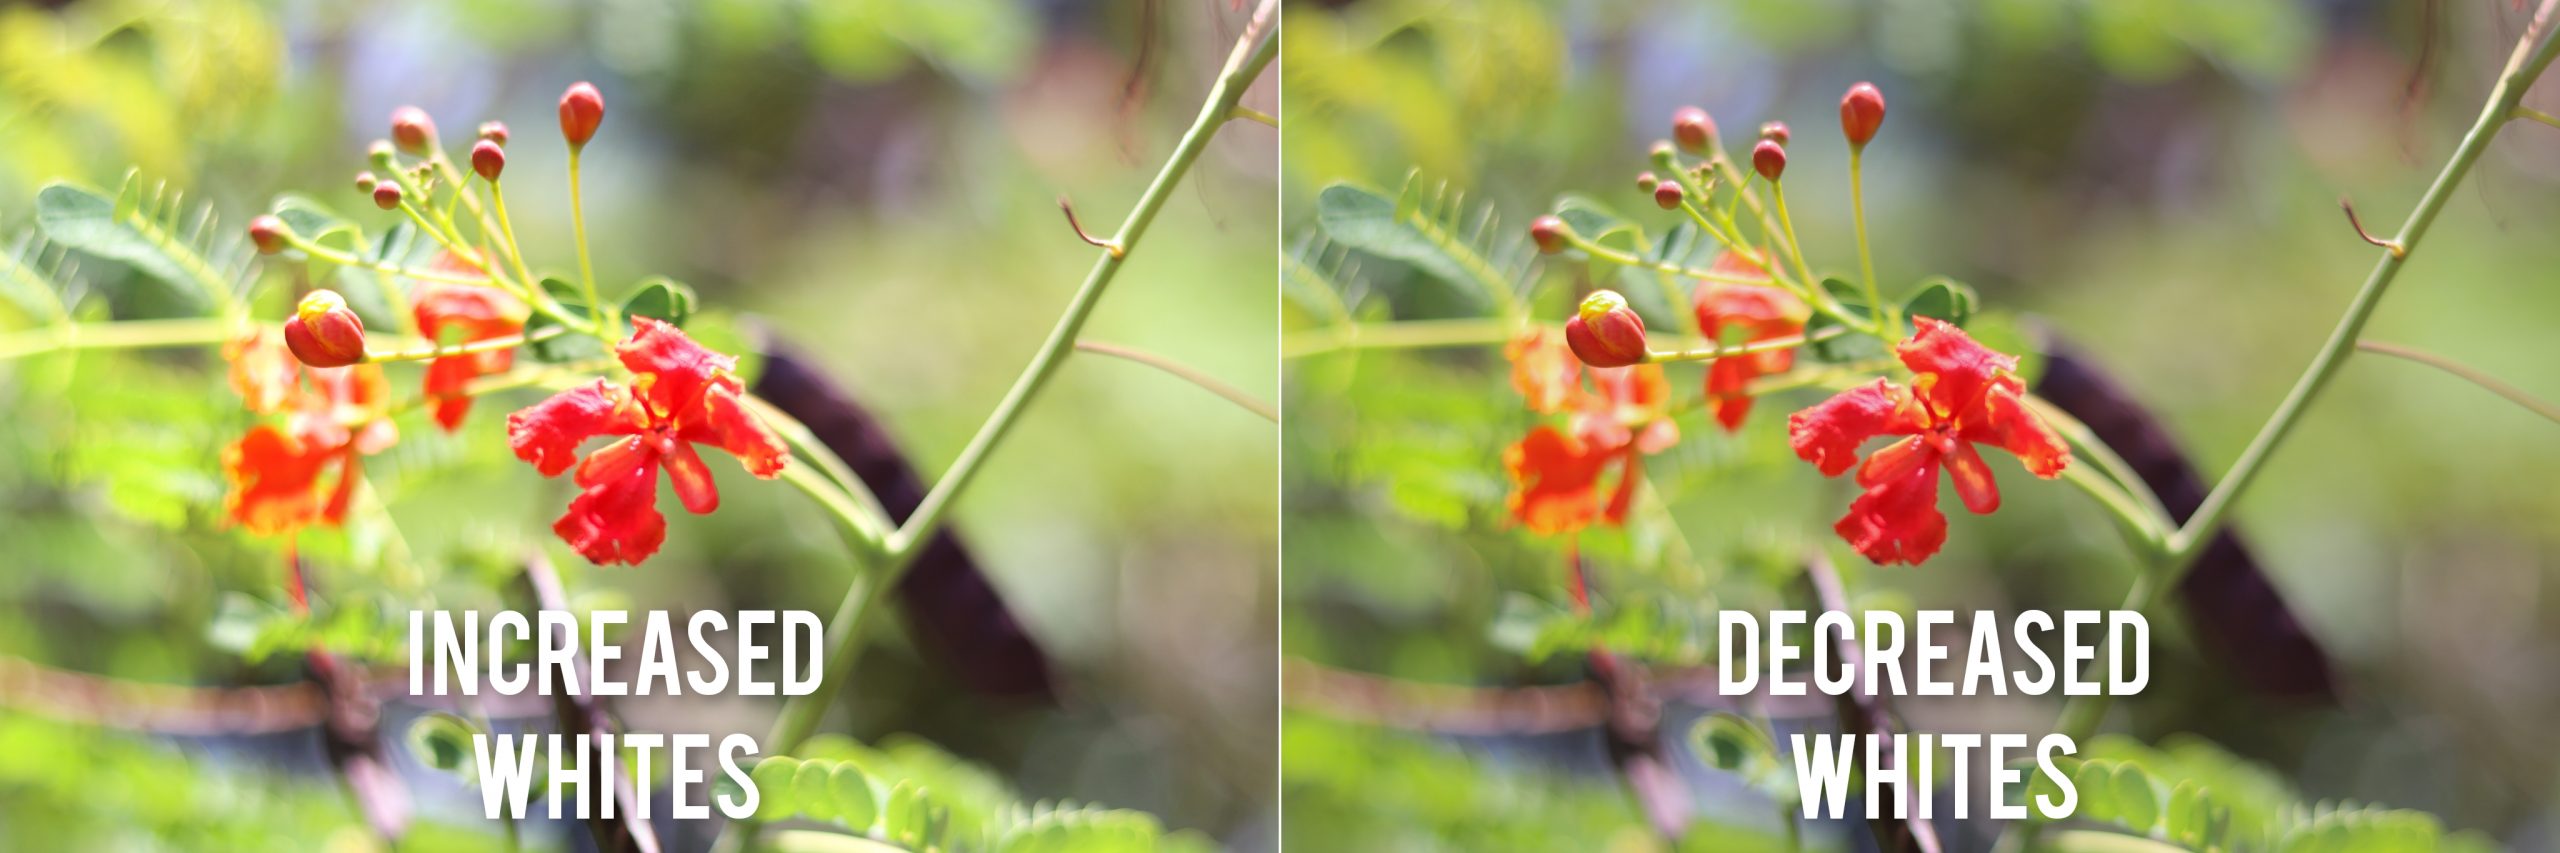
V. Whites Adjustments
Toggling the “Whites” value changes the brightest parts of the photos. Increasing it makes the areas brighter while decreasing it reduces the original brightness of these areas.
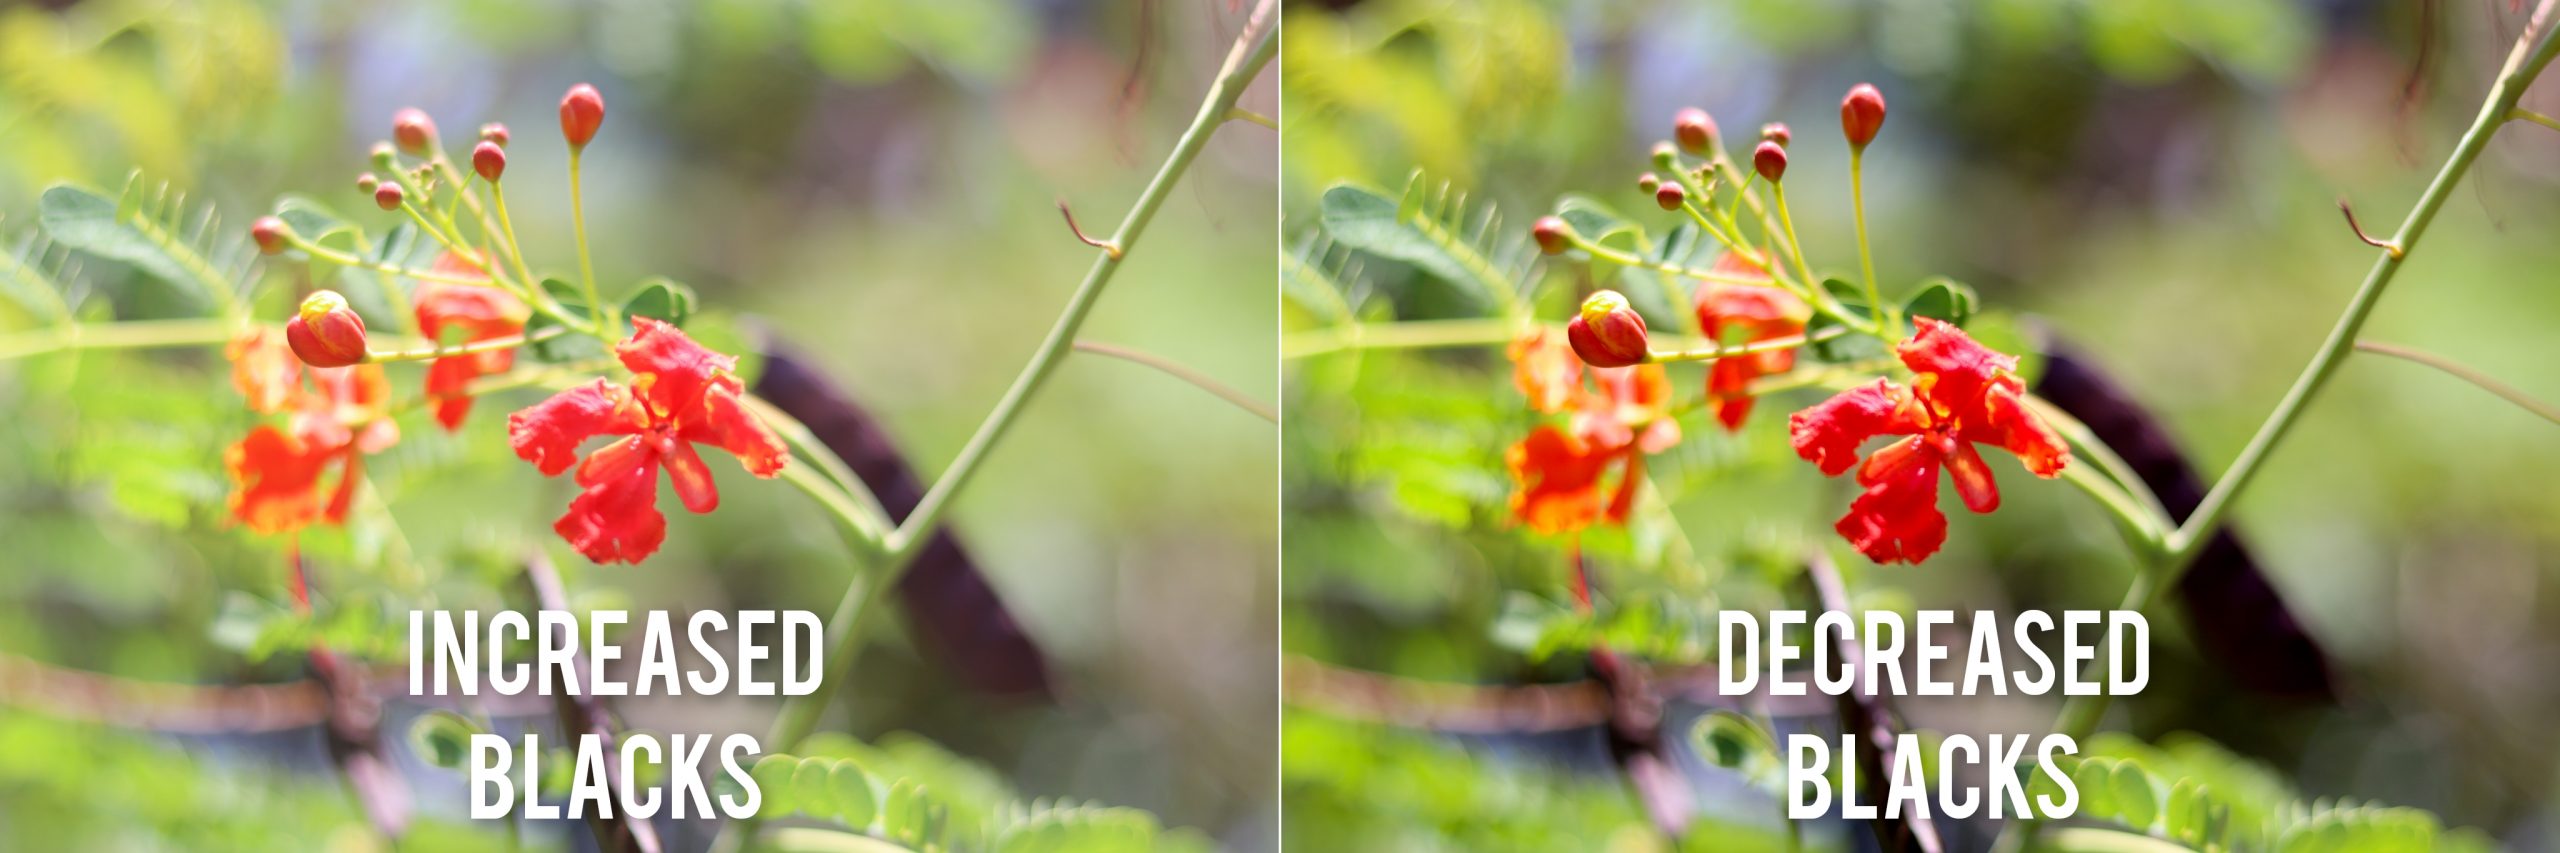
VI. Blacks Adjustments
Blacks affect the darkest parts of the photo. Adjusting this property of lighting in photography takes those areas and adjusts how dark or bright it appears. In the photo, these areas are the shadows from the plant and also the background.
The Output
A combination of adjustments of these different properties increases the overall look of your output. First, understand how each property affects the visual appearance of your photo. Then, apply them through editing. Next, understand that photo editing software provides more properties that could be adjusted. A firm grasp on these properties of lighting in photography already makes your photos distinct.
Post-processing your photos also provides a style that you can consistently show. Saving the values on the different properties and applying them to your other photos make these photos similar in style. Have a try and see how good it appears when looking at these photos side by side!
In conclusion, lighting is a vital part of photography. A great understanding of it together with its properties benefits the improvement of your photos. Also, remember that knowledge alone isn’t enough. Application of these provides security to truly reap its benefits.
Practice taking your photos to the next level by post processing them with any editing software. Wide varieties of photo editing software are available that can definitely do this. See for yourself the kind of results you can get with adjusting the properties of lighting in photography!
Sources:
Also check out:
Phone Photography Easy Tips & Tricks To Be A PRO