

I’ve always been captivated by the interplay of light with gemstones and precious metals. The art of jewelry photography demands precision and a keen eye for detail. Whether you’re a professional jeweler showcasing your creations or a hobbyist capturing your favorite pieces, mastering jewelry photography tips can elevate your business or personal portfolio.
However, due to their small size and highly reflective surfaces, photographing jewelry presents unique challenges. The sparkle I saw with my naked eye often vanished in my early attempts, replaced by dullness or harsh glare. This is a common obstacle faced by many beginners in jewelry photography. Fortunately, with the right approach, you can turn these hurdles into opportunities to create stunning images that truly capture the brilliance of your jewelry.
This guide equips you with the essential jewelry photography tips and techniques!
Table of Contents
Preparing Jewelry for Photography
Just like a perfectly applied layer of makeup enhances a portrait, a little preparation can make all the difference in your jewelry photography. Here are some key steps to ensure your jewelry shines both literally and figuratively in your final images.
Cleaning and Polishing
First impressions matter, and the same holds true for your jewelry photography. Ensure that your pieces are spotless and gleaming before you capture them. Any dust, fingerprints, or smudges can easily distract from the beauty and intricate details of your jewelry. Invest in a good quality microfiber cloth specifically designed for cleaning delicate surfaces. For heavily tarnished pieces, consult a professional jeweler for proper cleaning to avoid damaging the materials.
Handling Techniques
Jewelry is often delicate and requires careful handling to prevent scratches or damage. Always handle your pieces with clean, dry hands. If you’re prone to sweaty palms, consider wearing cotton gloves while handling and arranging your jewelry. This will not only prevent fingerprints but also minimize the risk of transferring any oils or dirt from your skin onto the pieces, ensuring they remain pristine for the photoshoot.
Arranging and Positioning
Now comes the fun part: showcasing your jewelry in its full glory! Carefully arrange your pieces to highlight their best features. Consider the overall composition you want to achieve and experiment with different angles and positions. For instance, rings can be displayed on ring holders or nestled amongst soft fabric to create a more natural look. Necklaces can be draped over stands or positioned flat to showcase their intricate details. The key is to be creative and use props strategically to maintain the shape and position of your jewelry while enhancing the overall visual appeal of your photograph.
Setting Up Your Photography Space
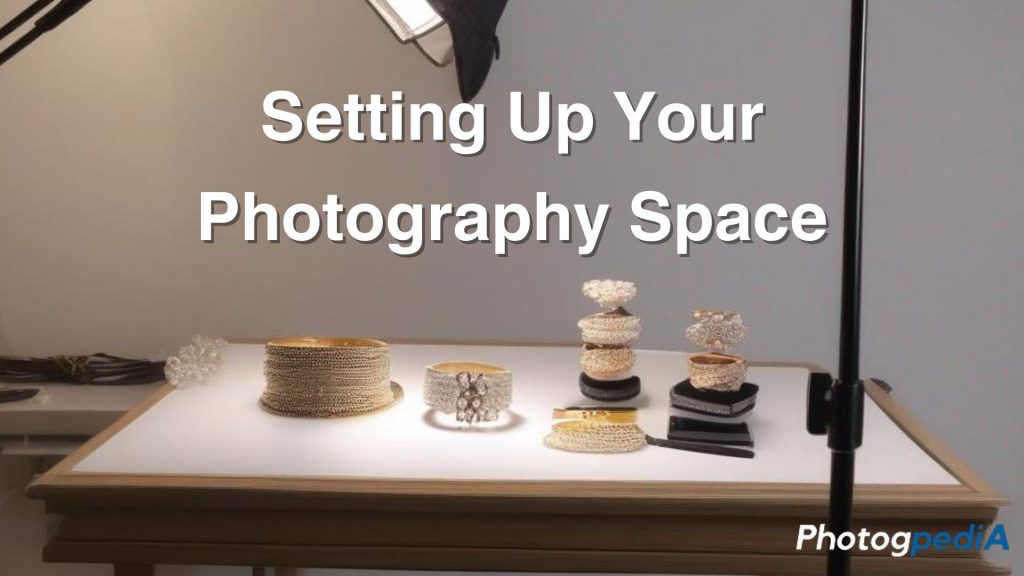
I’ve learned that a little prep work goes a long way in jewelry photography. Once I started paying close attention to the details of cleaning, handling, and arranging my pieces, I noticed a significant improvement in the overall quality of my images. A sparkling clean gemstone and a carefully considered composition can truly elevate your jewelry photography from good to great.
Choosing the Right Background
A clean and uncluttered background allows your jewelry to take center stage. Neutral backgrounds like white, black, or gray are popular choices as they don’t compete with the piece itself. However, depending on the style and color of your jewelry, you can also experiment with colored backgrounds to create a specific mood or complement certain gemstones. For instance, a turquoise necklace might look stunning against a soft teal backdrop. The key is to find a balance that allows your jewelry to shine without being lost in the background.
Creating a Lightbox
Light is the lifeblood of jewelry photography, but harsh light can create unwanted shadows and reflections. A lightbox is a valuable tool for diffusing light evenly around your jewelry, minimizing these issues and creating a soft, flattering illumination. You can purchase pre-made lightboxes specifically designed for product photography, or you can even create your own using a cardboard box and translucent paper. The key is to experiment and find a setup that works best for you and your lighting equipment.
Managing Reflections and Shadows
Reflections and shadows, while sometimes beneficial for adding depth and dimension, can also be a challenge in jewelry photography. Highly reflective surfaces, like polished metals and gemstones, can easily pick up unwanted reflections from your surroundings.
To combat this, diffusers made of tracing paper or white fabric can be placed strategically in front of your light source to soften the light and minimize reflections. Reflectors, on the other hand, can be used to bounce light back onto your subject, filling in shadows and creating a more balanced look. Mastering the interplay of light, diffusers, and reflectors is a key skill in achieving professional-looking jewelry photographs.
Lighting Techniques
When it comes to jewelry photography tips, lighting is king. The right lighting setup can make all the difference between a flat, lifeless image and a photograph that truly captures the essence of your jewelry. Here are some key considerations for lighting your jewelry photography:
Natural vs. Artificial Light
Both natural and artificial light have their advantages and disadvantages in jewelry photography.
- Natural Light: Soft, diffused natural light is often praised for its flattering quality and ability to capture the true colors of your jewelry. Think of a window on an overcast day – the soft, even light is ideal for outdoor jewelry photography. However, relying solely on natural light can be challenging. Natural light changes throughout the day, making it difficult to achieve consistent results. Additionally, finding the perfect balance of light and shade outdoors can be tricky.
- Artificial Light: Artificial light offers greater control and consistency, making it a popular choice for indoor jewelry photography. Studio lighting setups allow you to experiment with different lighting techniques and create the exact look you desire. However, artificial light can sometimes appear harsh or unnatural if not diffused properly.
Diffusing Light
Regardless of whether you choose natural or artificial light, diffusing the light is crucial for achieving professional-looking jewelry photographs. Harsh light creates unwanted shadows and glare, which can detract from the beauty of your pieces. Several tools can help you diffuse light:
- Softboxes: These box-shaped diffusers create a soft, flattering light that minimizes harsh shadows and highlights. They are a popular choice for jewelry photography due to their versatility and ease of use.
- Diffusing Panels: Similar to softboxes, diffusing panels offer a way to soften and spread light. They are often more portable and can be used with various light sources.
- Umbrellas: Translucent umbrellas are a cost-effective way to diffuse light. They come in various sizes and can be positioned to direct the light where you need it.
Using Reflectors
While diffusers help soften light and reduce harsh shadows, there are situations where you might want to add a touch of light back into specific areas. This is where reflectors come in. Reflectors are inexpensive and easy-to-use tools that bounce light back onto your subject, filling in shadows and adding depth to your images. They come in various colors, with white, silver, and gold being the most common. The color you choose will depend on the effect you want to achieve – white reflects the most light and creates a neutral fill, while silver provides a cooler tone, and gold adds a warmer touch.
Camera Settings – Jewelry Photography Tips
While fancy equipment can certainly elevate your jewelry photography, mastering your camera settings is equally important. Here are some key settings and jewelry photography tips to focus on:
ISO Settings
ISO refers to the camera’s sensitivity to light. In low-light situations, you might be tempted to increase the ISO to capture a brighter image. However, a higher ISO setting can introduce unwanted graininess or noise into your photos, which is particularly undesirable in jewelry photography where we want to showcase the clarity and sparkle of the pieces. Therefore, it’s recommended to keep the ISO as low as possible (ideally between 100-200) when shooting jewelry. If you find yourself needing more light, consider adjusting your aperture or shutter speed instead.
Aperture and Depth of Field
Aperture is the opening of the lens that controls the amount of light allowed to enter the camera sensor. It’s denoted by an f-number (e.g., f/2.8, f/8, f/16). A wider aperture (lower f-number) lets in more light and creates a shallow depth of field, where only a small portion of the image is in focus. A narrower aperture (higher f-number) lets in less light but creates a deeper depth of field, ensuring the entire piece of jewelry is sharp and in focus. In jewelry photography, where capturing details is paramount, using a small aperture (f/11 to f/16) is generally recommended to achieve a greater depth of field.
Shutter Speed
Shutter speed controls the amount of time the camera sensor is exposed to light. A slower shutter speed allows more light to enter the camera, resulting in a brighter image. However, a slower shutter speed also increases the risk of camera shake, which can blur your photos. When shooting jewelry photography, it’s essential to use a shutter speed fast enough to prevent blur. If you find that your desired aperture or ISO setting results in a slow shutter speed, consider using a tripod to stabilize your camera and ensure sharp images.
Post-Processing and Editing

Even with the most meticulous preparation and perfect camera settings, a touch of post-processing can elevate your jewelry photography to the next level. Here’s where jewelry photography tips on editing come into play.
Basic Editing Techniques
Photo editing software offers a powerful toolbox for enhancing your jewelry photographs.Start with some basic adjustments to optimize the overall look of your image:
- Brightness and Contrast: A slight increase in brightness can help lift shadows and reveal details hidden in darker areas. Conversely, a touch of contrast can add depth and definition to your image. Remember, moderation is key – aim for a natural and balanced look.
- Color Balance: Fine-tuning the color balance can ensure your jewelry’s colors are accurately represented. Additionally, subtle adjustments can enhance the vibrancy of gemstones or add a touch of warmth to the overall image.
Removing Imperfections
No matter how careful you are during the photoshoot, there’s always a chance of capturing dust particles or minor imperfections on your jewelry. Thankfully, modern photo editing software offers tools like the clone or healing tool, allowing you to remove these blemishes with ease. A quick touch-up here and there can make a significant difference in achieving a polished and professional final image.
Enhancing Colors
Jewelry photography is all about showcasing the beauty and brilliance of your pieces. Photo editing software can be a valuable tool for enhancing the colors of your jewelry, making them appear more vibrant and eye-catching. However, it’s important to exercise caution and avoid oversaturation. The goal is to make your jewelry look its best while maintaining a natural and realistic appearance. A subtle increase in vibrancy or selective adjustments to specific color channels can often achieve stunning results without compromising the credibility of your photographs.
Showcasing Different Types of Jewelry
Rings
Rings are often adorned with intricate details on both the band and the setting. To do them justice in your photographs, capture them from multiple angles. A straight-on shot showcasing the entire ring is essential, but don’t forget to include close-up shots that highlight the gemstone’s brilliance, unique design elements, or intricate engravings on the band. These close-up shots will allow viewers to appreciate the craftsmanship and artistry of your rings.
Necklaces
Necklaces come in various lengths and styles, each requiring a slightly different approach in jewelry photography. For longer necklaces, capturing the full sweep of the piece is important. Drape the necklace over a stand or prop it up in a way that showcases its natural flow. However, don’t forget the close-up details! Pendants, clasps, or unique features deserve their own spotlight. Consider using a macro lens for extreme close-ups of intricate details on pendants or gemstones. For shorter necklaces, a flat lay composition can be effective, allowing you to showcase the entire design while highlighting any central elements. Incorporating a model or mannequin can also be a valuable tool for displaying necklaces in a natural way, adding a touch of elegance to your photographs.
Earrings
Earrings come in a variety of styles, from simple studs to elaborate danglers. Regardless of the type, capturing both the front and back of the earrings is crucial in jewelry photography. This allows viewers to appreciate the full design and craftsmanship of the piece. For stud earrings, a straight-on shot showcasing the entire pair is essential. For dangler earrings, consider hanging them from a thread or stand to display their natural movement and dangle. Macro close-up shots can be particularly striking for earrings with intricate designs or unique details on the back.
Bracelets
Bracelets can be photographed in a variety of ways to showcase their design and functionality. A flat lay composition is a popular choice, allowing you to capture the entire bracelet in a single frame. This is particularly effective for showcasing bracelets with intricate patterns, engravings, or multiple charms. However, don’t neglect the power of a well-composed wrist shot. Photographing the bracelet on a model’s wrist or a stand adds a touch of realism and allows viewers to envision how the piece would look when worn. For bracelets with charms or clasps, consider including close-up shots to highlight these details and add visual interest to your photographs.
Mobile Jewelry Photography Tips
While a fancy DSLR camera can certainly elevate your jewelry photography, even beginners can achieve stunning results using their smartphones. The key lies in understanding your phone’s capabilities and utilizing them effectively.
Mobile Camera Settings
Many smartphones offer surprisingly robust camera applications that allow you to control some essential settings. If your phone’s camera app has a manual mode, take advantage of it! Manual settings give you more control over exposure and focus, enabling you to achieve better results in various lighting conditions. Experiment with adjusting the ISO, shutter speed, and white balance to optimize your photos for jewelry photography. Even if your phone doesn’t offer full manual controls, there might be options for adjusting exposure and focus, which can still make a significant difference in your images.
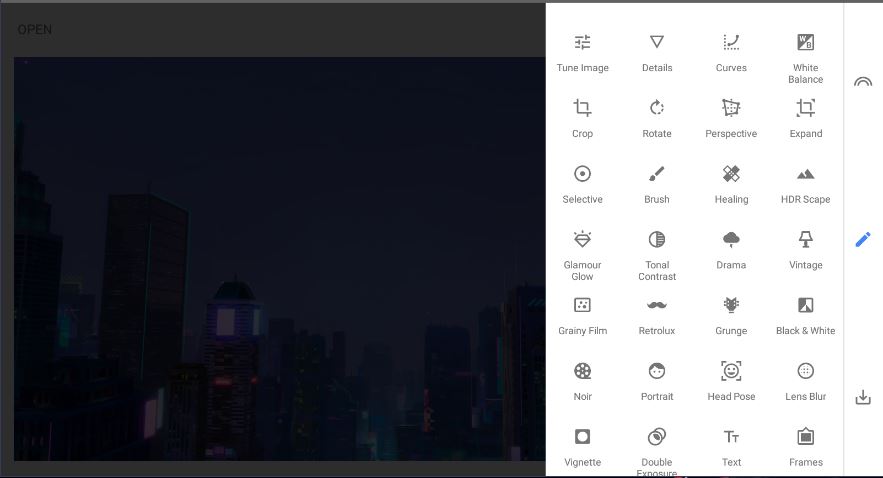
Handy Apps for Editing
There are numerous apps available, both free and paid, that can help you enhance your jewelry photographs. Popular choices include Snapseed and Lightroom Mobile, which offer a wide range of editing features like cropping, adjusting brightness and contrast, selective color adjustments, and noise reduction. These tools allow you to fine-tune your images and achieve a professional-looking finish, all from the convenience of your smartphone.
Lighting Solutions for Mobile Photography
While natural light is ideal for jewelry photography, it’s not always readily available or controllable. The good news is that there are affordable and easy-to-use lighting solutions specifically designed for mobile photography. Consider investing in a portable LED light or a small ring light. These lights provide a consistent and diffused light source, which can significantly improve the quality of your mobile jewelry photographs. By eliminating harsh shadows and creating a soft, flattering light, you can capture the sparkle and brilliance of your pieces even in less-than-ideal lighting conditions.
Conclusion
Mastering jewelry photography takes practice and patience, but the results are worth it. Remember, the journey of learning is ever-evolving. As you delve deeper into the world of photography, you’ll encounter new ideas and techniques that can further refine your skills. To fuel your creative fire, we invite you to explore these additional resources on our website:
- Best Metal Print Companies: Showcase your stunning jewelry photographs in a whole new light! Discover the top companies specializing in high-quality metal prints, allowing you to transform your digital creations into breathtaking, long-lasting keepsakes.
- AI Art Generators: Img2Img: Intrigued by the possibilities of artificial intelligence? Learn how Img2Img, a powerful AI art generator, can spark your creativity and inspire unique concepts for your jewelry photography.
- Stable Diffusion Tips and Tricks: Unleash the potential of Stable Diffusion, another cutting-edge AI art generation tool. Explore valuable tips and tricks to harness the power of AI and create stunning visuals that complement your jewelry photography endeavors.
We hope this guide has equipped you with the knowledge and confidence to embark on your jewelry photography journey. Keep experimenting, keep learning, and most importantly, keep capturing the essence of your beautiful creations!
About the Author
Hi, I’m Mark – an amateur photographer that first started in 2020. I particularly capture action figures in miniature settings and dioramas. You can follow more of my work at the following social media channels:
- Instagram – iselandmarkventures
- Facebook – iselandmarkventures
- YouTube – The Iselandmarkventures