Getting into photography is an exciting journey filled with creativity and exploration. I vividly remember the thrill of holding my first camera, eager to capture the world around me in a new light. But then came the hurdle – the seemingly endless list of buttons, dials, and a menu overflowing with unfamiliar terms like “aperture,” “shutter speed,” and “ISO.” Understanding camera settings for beginners can feel overwhelming, like deciphering a foreign language.
Here’s the good news: you don’t need a photography degree to take stunning photos! This guide will break down the essential camera settings into bite-sized pieces, empowering you to take control of your camera and translate your creative vision into reality. Let’s embark on this journey together, one setting at a time!
Table of Contents
Understanding Your Camera
Before we dive into the specifics of camera settings for beginners, let’s take a moment to familiarize yourself with your trusty camera companion. Understanding its parts and the different types of cameras available will lay a solid foundation for mastering those settings and unleashing your photographic potential.
Basic Parts of a Camera
Think of your camera as a light-capturing machine with a brain (the processing unit) and a creative partner (you!). Here’s a quick breakdown of the essential components:
- Lens: This is the “eye” of your camera, responsible for gathering light and focusing it onto the sensor. Lenses come in various focal lengths, which affect the field of view (how much of the scene is captured) and magnification.
- Body: The camera body houses the sensor, the processing unit (the brain!), and other crucial components. This is where you’ll find the controls – buttons and dials – that allow you to adjust various camera settings.
- Sensor: This light-sensitive chip acts like a digital film, capturing the image formed by the lens. Sensor size plays a significant role in image quality, with larger sensors generally producing better low-light performance and sharper images.
- Viewfinder/Screen: This is where you compose your shot and see the world through your camera’s “eyes.” Optical viewfinders (present in most DSLRs) offer a real-time view of the scene, while electronic viewfinders (common in mirrorless cameras) display a digital representation of the image. Many cameras also have a rear LCD screen that allows you to preview your photos and adjust settings.
Types of Cameras
The world of photography offers a variety of camera options to suit different needs and budgets. Here’s a quick overview of the most common types:
- DSLRs (Digital Single-Lens Reflex): These classic cameras offer excellent image quality, interchangeable lenses for versatility, and precise manual controls. They can be a bit bulky and heavier compared to other options.
- Mirrorless Cameras: Gaining popularity for their compact size and lightweight design, mirrorless cameras offer high-quality images and interchangeable lenses similar to DSLRs. Their electronic viewfinders provide a real-time view of the scene with the applied settings.
- Point-and-Shoot: Perfect for beginners or casual photographers, point-and-shoot cameras are known for their simplicity. They offer automatic shooting modes and require minimal user input, making them ideal for capturing everyday moments without worrying about complex settings.
- Smartphone Cameras: The convenience of having a camera readily available in your pocket is undeniable. Modern smartphone cameras have come a long way, capable of producing surprisingly good photos in well-lit conditions. While they may not offer the same level of control or image quality as dedicated cameras, they are a great option for on-the-go photography and sharing.
Remember: As a beginner, don’t get overwhelmed by the different camera options. Start with what you have, be it a smartphone or a point-and-shoot camera, and focus on understanding the basic principles of photography.
Essential Camera Settings for Beginners

Understanding the three pillars of photography – aperture, shutter speed, and ISO – empowers you to take complete control over how light interacts with your camera’s sensor, ultimately affecting the look and feel of your final image.
Aperture
Imagine the aperture as the pupil of your eye. It’s the opening in the lens that controls the amount of light entering the camera sensor. Aperture is measured in f-stops, denoted by numbers like f/2.8, f/5.6, and so on. Here’s how it works:
How to Adjust Aperture:
Locate the aperture control on your camera, often found in the menu or on a dedicated dial. Lower f-stop numbers (e.g., f/2.8) represent a larger aperture, allowing more light to reach the sensor. This is ideal for low-light situations or when you want to achieve a shallow depth of field – that beautiful blurry background effect that isolates your subject. Conversely, higher f-stop numbers (e.g., f/16) signify a smaller aperture, letting in less light. This is perfect for capturing landscapes where you want everything in focus from foreground to background.
Shutter Speed
Shutter speed, simply put, determines the length of time the camera’s sensor is exposed to light. It’s measured in seconds or fractions of a second, like 1/1000s or 1/30s. Think of it like the duration of a movie projector’s light beam illuminating the screen.
How to Adjust Shutter Speed:
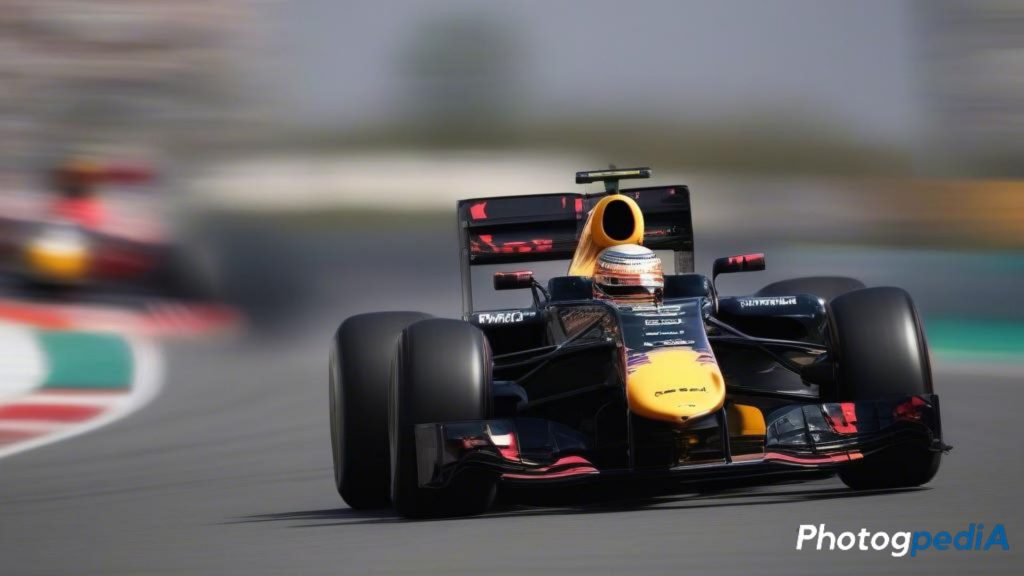
You can adjust the shutter speed using your camera’s control dial or menu. Faster shutter speeds (e.g., 1/1000s) freeze motion in its tracks, making them perfect for capturing action shots like a child jumping or a bird in flight. Slower shutter speeds (e.g., 1/30s) allow more light to reach the sensor but also introduce motion blur. This can be a creative tool for artistic effects like silky smooth water or light trails from moving vehicles at night.
ISO
ISO refers to the camera sensor’s sensitivity to light. Similar to the ISO setting on a film camera, it determines how much the sensor needs to amplify the incoming light to create an image. Lower ISO values (e.g., 100) represent lower sensitivity, resulting in cleaner images with less noise (graininess). This is ideal for bright daylight conditions. Higher ISO values (e.g., 3200) increase the sensor’s sensitivity, allowing you to capture photos in low-light situations. However, there’s a trade-off – higher ISOs can introduce unwanted noise into your image.
How to Adjust ISO:
Most cameras allow you to change the ISO setting through the camera menu or a dedicated button. In bright conditions, prioritize a lower ISO to maintain the highest image quality. As the lighting gets dimmer, you may need to increase the ISO to capture a properly exposed image, but be mindful of potential noise creeping in.
Advanced Camera Settings for Beginners
Having grasped the core concepts of aperture, shutter speed, and ISO, you’re well on your way to capturing stunning photos! But you’ll notice more options to explore as your skills develop. Let’s delve into some advanced camera settings for beginners that can further enhance your photographic journey.
White Balance
Imagine taking a photo under a warm incandescent light bulb – the whites in your image might appear slightly yellow. This is where white balance comes in. It fine-tunes the color temperature of your photos to ensure whites appear neutral and accurate under different lighting conditions. For instance, a “daylight” white balance setting would be ideal for a photo taken outdoors on a sunny day, while a “tungsten” setting would be appropriate for a picture shot under indoor light bulbs.
How to Adjust White Balance:
Most cameras offer white balance presets like daylight, cloudy, tungsten, and fluorescent. These can be a great starting point. For even more precise color accuracy, you can use the manual white balance setting and adjust it based on a reference point like a white card or a neutral-colored surface in the scene.
Focus Modes
Sharpness is paramount in photography, and achieving it relies on accurate focusing. Your camera offers two primary focus modes: autofocus and manual focus.
Auto-Focus vs. Manual Focus:
Autofocus is a convenient and fast option, making it ideal for most everyday photography situations. The camera detects the subject and automatically adjusts the lens to achieve sharp focus. Manual focus, on the other hand, puts you in complete control over the focusing process. This can be particularly useful in low-light conditions where autofocus might struggle or for intricate macro photography where precise focus placement is critical.
When to Use Each Mode:
As a beginner, relying on autofocus for general shooting and capturing moving subjects is a safe bet. However, as you experiment and develop your skills, consider trying manual focus for static subjects or situations where autofocus might not be reliable. The beauty lies in the creative control it offers!
Metering Modes
Proper exposure is another crucial aspect of photography. Metering modes determine how your camera measures light within the frame to achieve a balanced exposure. There are three main metering modes to consider:
Types of Metering Modes:
- Matrix/Evaluative: This is the default mode on most cameras and considers the entire frame to calculate the exposure. It’s a good all-around option for balanced exposure in most scenes.
- Center-Weighted: This mode prioritizes the light reading from the center of the frame, making it suitable for portrait photography where your subject is positioned in the center.
- Spot: This mode measures light only in a small, designated area of the frame. It’s ideal for high-contrast scenes where you want to ensure a specific element is correctly exposed, such as a bright flower against a dark background.
How to Choose the Right One:
The best metering mode depends on your shooting scenario. For most situations, Matrix/Evaluative metering is a reliable choice. If you’re focusing on a specific subject in the center of the frame, center-weighted metering can be beneficial. For those high-contrast scenes, experiment with spot metering to achieve the desired exposure.
Using Camera Modes
You’ve aced the essential and advanced camera settings for beginners! Now, let’s explore how your camera itself can be your guide on this photographic adventure. Camera modes offer a variety of options to simplify shooting, experiment with different settings, and ultimately capture stunning images.
Auto Mode
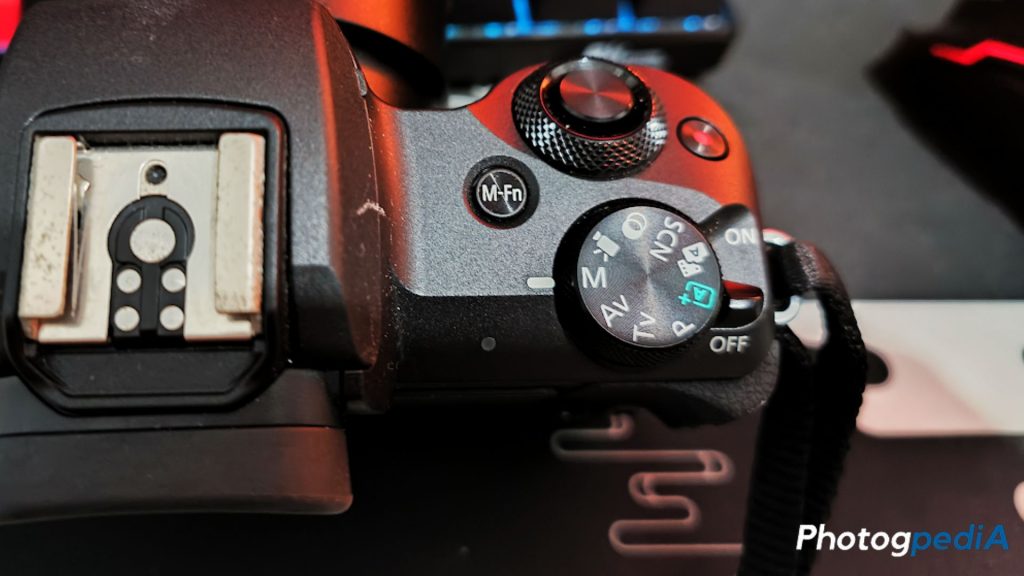
This is the simplest mode, often denoted by an “Auto” icon. In auto mode, the camera takes the wheel, automatically selecting aperture, shutter speed, ISO, and other settings based on the scene. While convenient for quick snapshots or when you’re just starting out, auto mode offers limited creative control. As you become more comfortable with your camera, you might find yourself itching to explore the creative possibilities offered by manual settings.
Scene Modes
Most cameras come with a variety of scene modes, typically represented by icons like “Portrait,” “Landscape,” “Sports,” or “Night.” These modes take the guesswork out of capturing specific subjects or situations. For instance, “Portrait” mode might prioritize a wider aperture for a shallow depth of field, pleasingly blurring the background behind your subject. “Sports” mode, on the other hand, might select a faster shutter speed to freeze the action of a moving athlete.
Scene modes are a great way to learn about how different settings affect your photos and achieve specific results without manually adjusting everything yourself, making them a great introduction to camera settings for beginners.
Manual Mode
This mode, often denoted by an “M” on the camera dial, puts you in the driver’s seat. You have complete control over all camera settings – aperture, shutter speed, ISO, and more. While it might seem daunting at first, manual mode empowers you to unleash your creativity and capture photos that reflect your unique vision.
It’s also an excellent way to truly understand how each setting works and how they interact with each other to influence the final image. However, for beginners, it’s best to ease into manual mode after familiarizing yourself with the individual settings through other modes.
Aperture Priority Mode (Av or A)
This mode offers a nice balance between automation and control for camera settings for beginners. You set the desired aperture (remember, this controls depth of field), and the camera likewise automatically adjusts the shutter speed to achieve a balanced exposure.
Aperture priority mode is ideal for situations where you want creative control over background blur, such as portrait photography or isolating a flower in bloom.
Shutter Priority Mode (Tv or S)
In this mode, you take control of the shutter speed. This is perfect for capturing motion – whether it’s freezing a runner crossing the finish line or creating a silky smooth effect for waterfalls by using a slower shutter speed.
The camera will then adjust the aperture to get a good exposure. Shutter priority mode is a valuable tool for situations where capturing action or movement is your primary focus, making it a great option to experiment with.
Practical Exercises

Now that you’ve explored the world of camera modes and gained a solid understanding of essential and advanced settings, it’s time to put your knowledge into action! The following practical exercises will help you solidify your grasp of these concepts and witness firsthand the impact of different settings on your photos.
Exercise 1: Playing with Aperture
Let’s delve deeper into aperture and its influence on depth of field. Set your camera to aperture priority mode (often denoted by Av or A on the dial). This mode allows you to control the aperture while the camera automatically adjusts the shutter speed for a balanced exposure.
Now, take a series of photos of the same subject at different f-stop values (e.g., f/2.8, f/5.6, f/8). As you decrease the f-stop number (wider aperture), observe how the background becomes increasingly blurred, creating a pleasing separation between your subject and the background. Conversely, increasing the f-stop number (narrower aperture) brings both the foreground and background into sharper focus. Experimenting with aperture is a fantastic way to understand how it affects the aesthetic of your photos.
Exercise 2: Experimenting with Shutter Speed
Now, let’s shift our focus to shutter speed and its role in capturing motion. Switch your camera to shutter priority mode (usually denoted by Tv or S on the dial). In this mode, you control the shutter speed, and the camera adjusts the aperture accordingly.
Find a moving subject, like a child running or a car passing by. Capture a series of photos at different shutter speeds (e.g., 1/1000s, 1/250s, 1/60s). Notice how a faster shutter speed (like 1/1000s) freezes the action in its tracks, while a slower shutter speed (like 1/60s) introduces motion blur, creating a sense of movement or a silky smooth effect for water elements in your scene. Understanding shutter speed empowers you to creatively depict motion in your photographs.
Exercise 3: Adjusting ISO for Different Conditions
Finally, let’s explore ISO and its impact on image quality in varying lighting situations. Most cameras allow you to adjust the ISO setting through the menu or a dedicated button. Find a well-lit environment and take a photo at a low ISO setting (e.g., 100). Then, move to a dimly lit area and capture another photo at a higher ISO setting (e.g., 1600, 3200).
When you compare these images on your camera screen or computer, you’ll likely notice a difference in noise levels. Lower ISO values generally produce cleaner images with less noise, while higher ISO settings can introduce graininess. While ISO allows you to capture photos in low light, it’s important to find a balance between acceptable noise levels and capturing the scene properly exposed.
Conclusion
Congratulations! You’ve embarked on a fantastic journey into the world of camera settings for beginners. Most importantly, you’ve begun to understand how these settings work together to influence the final image you capture.
Don’t be afraid to revisit these concepts, refer back to the practical exercises, and keep challenging yourself with new techniques. Surely the more you practice, the more comfortable you’ll become with your camera, and the more you’ll develop your unique photographic style.
Ready to showcase your stunning creations? Now that you have a solid grasp of camera settings, you might be considering turning your digital masterpieces into beautiful prints. If you’re looking for high-quality metal prints to preserve and display your work, we recommend checking out resources like Best Metal Print Companies. This article offers valuable insights and comparisons to help you choose the perfect company for your needs.
Exploring the world of AI-powered art creation? With your newfound understanding of camera settings, you might be curious about the exciting potential of artificial intelligence in the art world. If you’re interested in learning more about tools like Stable Diffusion, which can generate images based on text prompts, check out this article: Stable Diffusion Tips and Tricks.
Want to delve deeper into image manipulation techniques? This article on Img2Img AI Art Generation explores the fascinating world of image-to-image generation using AI, allowing you to transform existing photos into something entirely new.
The next chapter in your photographic adventure awaits! Stay tuned for further explorations into composition, lighting, and other creative aspects of photography. Happy shooting!
About the Author
Hi, I’m Mark – an amateur photographer that first started in 2020. I particularly capture action figures in miniature settings and dioramas. You can follow more of my work at the following social media channels:
- Instagram – iselandmarkventures
- Facebook – iselandmarkventures
- YouTube – The Iselandmarkventures

