

Lighting setups for photography can make or break your photo. A well executed photo takes into account how light applies to the subject and scene. On the other hand, overusing and minimizing the light can produce overexposed and underexposed photos respectively. The photographer needs a perfect balance of the amount of light to produce high quality images. This is achievable using different lighting setups for photography.
Table of Contents
Brushing Up on Lighting
Lighting heavily affects photography as it is the backbone of it. Photography literally is drawing with light. Thus, it is of utmost importance to fully understand the concepts of lighting. Everything else related to photography follows.
Post-processing of photos can adjust the minor mistakes with lighting from the get go. There are various editing softwares that are easy to learn available in most devices. Great understanding of the different lighting properties such as brightness and contrast among others are beneficial to post-processing.
Lighting is a vital part of photography. A great understanding of it together with its properties benefits the improvement of your photos. Also, remember that knowledge alone isn’t enough. Application of these provides security to truly reap its benefits.
Lighting Setups for Portrait Photography
In portrait photography, the subject’s face must be properly and creatively lit. No matter what background, a fantastic application of the lighting fundamentals would bring out the best in your portrait photography.
Creative lighting setups help in portrait photography to bring out a great balance of shadows and highlights for the subject. This avoids a flat looking image that makes your photos look like ID pictures.
Here are creative lighting setups for photography using only one light. You’ll notice the different variations and shadows casted by these lighting setups.
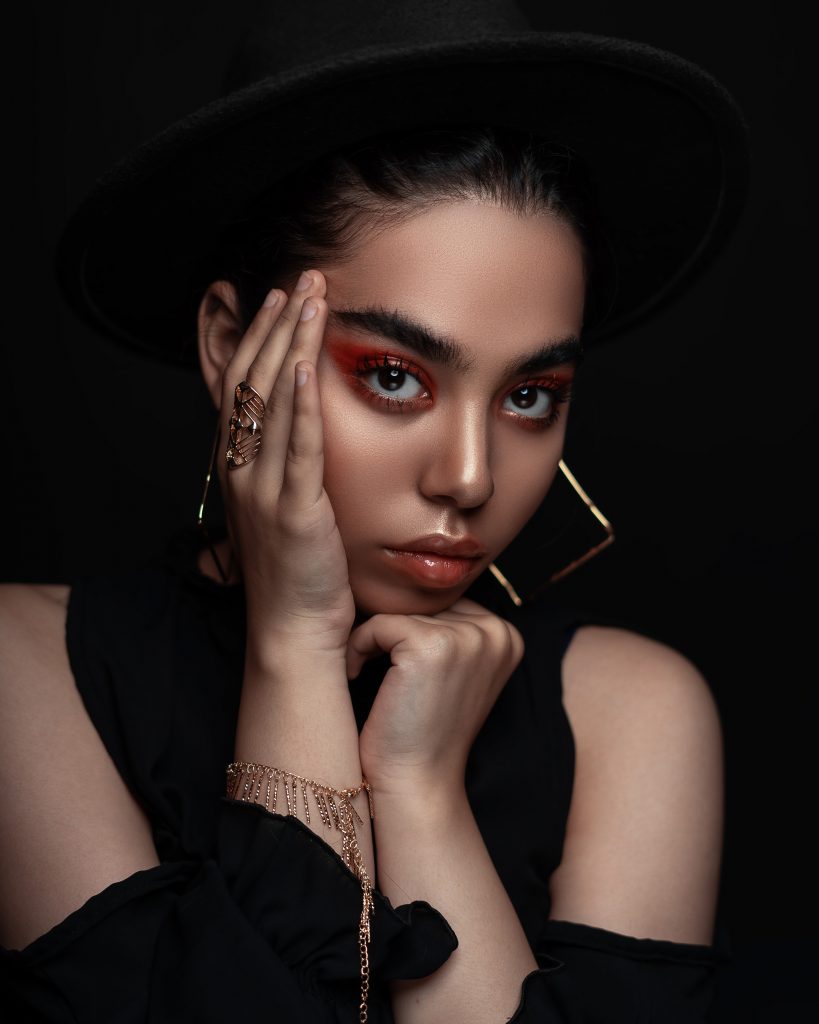
1. Rembrandt Lighting
This lighting technique heavily draws inspiration from the Dutch painter Rembrandt Harmenszoon van Rijn. His paintings show off a gorgeous quality of light. Modern age photographers emulate this lighting in their work. A light is positioned overhead and at a 45 degree angle. This lighting technique produces a triangle shaped shadow off of the subject’s nose that connects to the shadow of the chin.
This lighting setup produces fantastic application of contrast. The great highlight for one side of the subject’s face while casting off a rich dark shadow on the other manifests contrast. Overall, the Rembrandt lighting setup for photography provides a picturesque feel to the portrait.
2. Split Lighting
Talking about contrast, this brings the most contrast among these lighting setups. Essentially, this is the same with side lighting. The light is placed directly on the side of the subject thus producing no trace of light to the opposite half. Most of the light is concentrated on one side of the subject slowly spreading to the subject’s face.
A clear division between the bright and dark parts of the subject can be seen. This division is equal between the nose. Similar to Rembrandt lighting, the amount of contrast in this setup is fascinating.
3. Broad Lighting
In this lighting setup, the light source is still oriented overhead. The main difference is the point in which this hits the subject. The orientation of the light source provides luminance to the back of the subject at an angle.
The Broad lighting setup creates a shadow for the front of the subject’s body. At the same time, the face has a dramatic mood due to the shadows casted on it. Direct your subject to tilt their head in a way where some light still touches part of their face.
4. Paramount / Butterfly Lighting
The Paramount or Butterfly lighting setup is a variation of front lighting. The light source is placed overhead directly in front of the subject. It is then angled to face downwards but still maintaining a direct impact to the subject’s face.
A shadow forms under the nose and chin. The shadow that forms below the nose appears like a butterfly, hence the name of this lighting setup. This setup focuses on bringing forth every detail of the subject’s face and providing little contrast.
5. Loop Lighting
The setup for Loop lighting directly follows that of Rembrandt lighting but avoids creating the trademark triangle shaped shadow from the nose. At a 45 degree angle overhead the subject, this lighting technique also provides fantastic application of contrast and detail.
Portrait Photography Lighting Setup Variations
The previously discussed 5 lighting setups for portrait photography uses only one light source. Variations to these basic setups create new styles of lighting.
You can add another light source or a reflector that minimizes unwanted shadows and points of contrast in a single light setup. Also take note of the distance of your light sources with respect to your subject. This affects how exposed your subject will be. As a rule of thumb, avoid overexposure and underexposure. Practice to find the perfect setting and distance of your lights.
Lighting Setups for Product Photography
Product photography is a fun branch of photography to experiment on. As your subjects are small compared to other photography niches, playing with light setups is easy. Consider this to be your main playground in understanding lighting setups for photography.
Find a household item, gather your lights, and follow this list of different lighting setups. Practice over time and surely, the fundamentals of lighting becomes a muscle memory. Side lighting, backlighting, and front lighting are the most basic of the setups.
For a quick rundown, here are the main orientations for each lighting setup. Side lighting uses one light source directly at the side of the subject. Front lighting uses a light source similar to the orientation of the camera. Lastly, backlighting places the light source behind the subject.
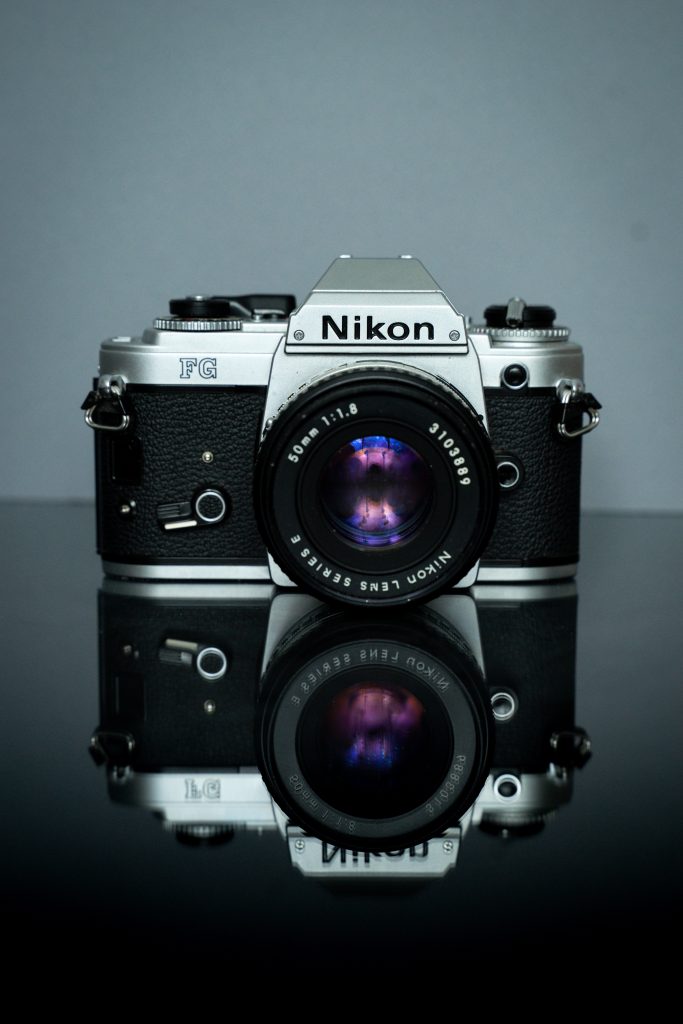
1. Overhead Lighting
Similar to the single light portrait photography setups, this uses a light source overhead the subject. This also produces dramatic results providing rich shadows on the opposite side of the light. Its main applications are for luxury products such as wrist watches and liquor.
2. Full Coverage Lighting
This lighting setup for photography utilizes 3-point lighting. Three light sources are oriented to bring out the detail of the product. This is useful for products that have intricate carvings as their main selling point.
Two lights are oriented in the side lighting manner, one on the left and the other on the right. The last light source is at the same orientation of the front camera. When using this lighting setup, take note of the distance of the side lights.
Generally, maintain an equal distance of the two light sources between the subject. Lastly, for the front light, avoid overexposure as this removes all the wanted detail completely.
3. Triangle Lighting
This also uses three point lighting in its setup. The main goal of this product photography lighting setup is for form emphasis.
The orientation of the three lights are as follows. One light follows the front lighting setup. The other two are placed behind both at 45 degree angles towards the subject. This creates a three dimensional look that emphasizes the subject’s form.
4. Separation Lighting
This photography setup also follows the three point lighting concept. Much like Triangle lighting, the placement of the lights are the same. The only difference is where the back lights are facing. Instead of towards the subject, the light sources are directed towards the background.
The main goal of this lighting setup is separation of the subject to the background. This setup creates a lighting cast that makes the subject appear at a distance from the background.
Product Photography Afterword
In the previous section, combinations of multiple light orientations produced various outputs. Each has a certain purpose that benefits your product photography greatly. Aside from those listed above, play around with more light placements.
Lighting Setups for Cinematic Photography
Cinematic lighting creates an overall dramatic mood to your photos. These are typically combinations of multiple lighting techniques. Combinations produce scenes where every detail of the setting is given a highlight.
Emulating lighting from classical paintings gives off a cinematic mood to it. Thus, the Rembrandt Lighting setup is a cinematic lighting setup.
In this section, additional lighting setups aside the previous ones will be highlighted. Note that application and combination of the previously discussed setups also produce cinematic lighting.
1. Key Lighting
A key light is the primary light source in a setup. This is the first thing that cinematic photographers set up. This can be considered as the “spot light” for cinematic scenes.
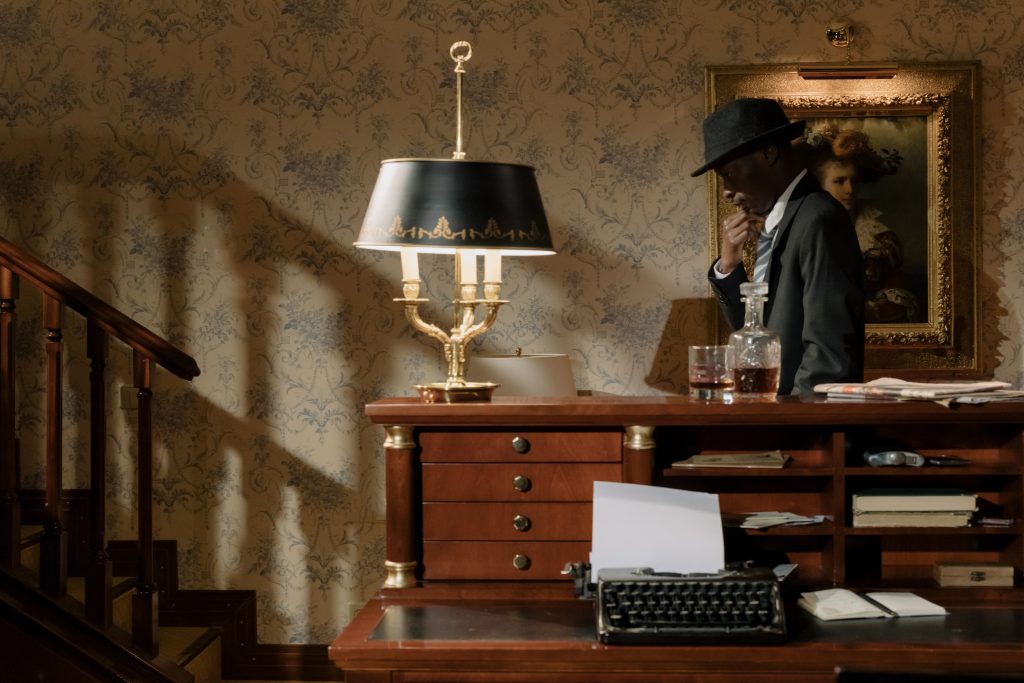
2. Practical Lighting
This lighting setup involves the use of day to day objects that are practically light sources. These include lamps, light bulbs, candles, television sets, LED signages, and more.
Sometimes it’s difficult to work with practical light sources. Their brightness usually is difficult to manipulate. Photographers who practice cinematic lighting often add diffusers or dimmers to adjust the brightness of lamps.
3. Soft Lighting
This is typically used to light off persons on a scene. Soft lighting produces flat brightness and highlights. This is also the most common lighting for portrait photography. Soft Lighting lessens the appearance of shadows, wrinkles, etc. Its main purpose is for beautification.
4. Hard Lighting
On the other hand, hard lighting is the total opposite of soft lighting. This emphasizes detail and texture. This is especially useful for diverting the attention of the audience to the subject. It creates high contrast because of the richness of shadows it produces.
5. Low Key Lighting
Another essential lighting setup for cinematic photography is low key lighting. If there is a requirement of loneliness, low key lighting achieves it. This uses a strong key light source to produce and emphasize shadows.
The main focus for this lighting setup is the play with shadows. Adjustments of shadows portray sorrow, horror, or mystery.
6. Motivated Lighting
This is an alteration of practical lighting. Additional light sources emphasize the practical light emitted by light sources. A great example of this is the placement of an additional light source inside a refrigerator.
This creates a cinematic mood by highlighting the interaction of the subject with inanimate objects.
Cinematic Lighting Challenge
At first, cinematic lighting seems challenging. This is true if you lack the fundamentals of lighting setups. It’s generally advisable to hone your skills with basic lighting setups first before giving cinematic lighting a try.
Foreword
I truly advocate the application of knowledge. It’s extremely helpful to know these concepts in mind. It’s a whole other thing once you put it into practice. You will get a feel of how the slightest of changes in your lighting setup changes the output of your photo.
There is no greater teacher than experience. Photography and lighting always come hand in hand. Personally, it’s a huge fulfilling experience to understand and practice lighting. Not only will your photos stand above the rest, but it also gives off a sense of accomplishment.
Setting up your lights is time consuming. Achieving your desired output after putting in all the work is the most important thing. May this short article about various lighting setup be your start to applying more setups in your photography.
1 Comment
Really helpful article Mark. Thanks for sharing. As the original founder of Photogpedia, I would love to collaborate with you in the future. If anyone’s looking for inspiration from the masters of cinema, then check out my new website filmmakingquotes.com. Looking forward to seeing how you continue to develop the site. Love these new tutorials – a wonderful addition to a wonderful resource. Keep up the great work.